Microsoft is taking one more step to force you to use an internet-connected Microsoft Account to install Windows. In their latest build 26200.5516 (based on Windows 11, version 24H2) they have removed a commonly-used script to setup a local account during the install process.
Quote from the Windows Insider Blog Post:
We’re removing the bypassnro.cmd script from the build to enhance security and user experience of Windows 11. This change ensures that all users exit setup with internet connectivity and a Microsoft Account.
This change is currently in the Beta preview builds so it may be a while before you need to use this new workaround.
What used to work
Many used invalid or blocked email addresses for Microsoft Accounts during setup (like no@thankyou.com) but Microsoft blocked using those fake accounts last year. You could also simply unplug your network cable, or prevent an internet connection by other means (like taskkill /f /IM oobenetworkconnectionflow.exe) and a local account setup was an option.
What works today, but not in the future
Most recently, you could use Shift+F10 during the setup process and type OOBE\BYPASSNRO and the setup process will allow you to continue setup using a local account. According to that insider blog posts, this option will no longer be available in future Windows 11 releases. If you try the OOBE\BYPASSNRO command in the newest Beta build, you will get the error Command not recognized.
What continues to work
Fortunately, you still have some choices to continue the install process without using a Microsoft Account, as detailed below.
1) Add the OOBE registry entry manually
The BypassNRO script is being removed, but the registry entry will still be supported (at least for now.) At a command prompt, type the following commands to create the same registry key which the OOBE\BYPASSNRO script used to create. Once you hit enter after the shutdown command, the system will reboot.
1
2
reg add HKLM\SOFTWARE\Microsoft\Windows\CurrentVersion\OOBE /v BypassNRO /t REG_DWORD /d 1 /f
shutdown /r /t 0
Alternatively, simply run regedit and manually navigate to the registry entry above and set the ByPassNRO value manually.
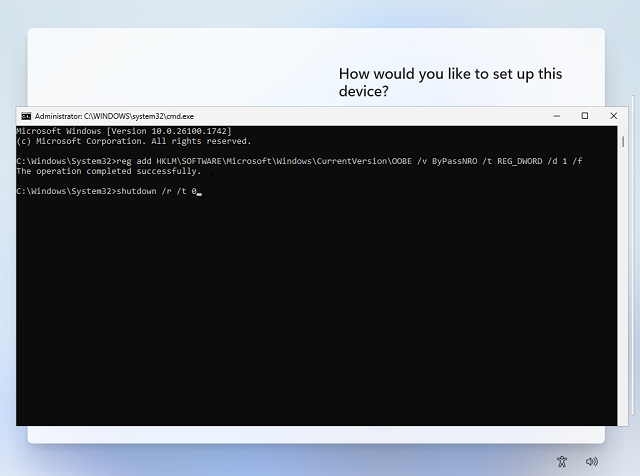
Your system should be restarted, and you will be able to continue the setup process with limited network connectivity as an option which will allow you to create a local account.
2) Run a special OOBE command to create a local admin user
Alternatively, during the setup process, you can hit Shift-F10 to reach a command prompt and then run the following command to create a local-only account:
1
start ms-cxh:localonly
This will immediately popup the following screen for you to “Create a user for this PC” as seen below:
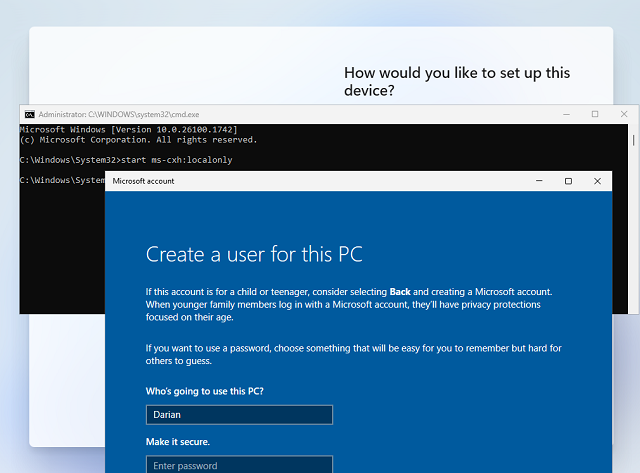
Once your new local account is created, the setup process will continue, and you will eventually end up with a local admin account as seen below. No Microsoft Account needed!
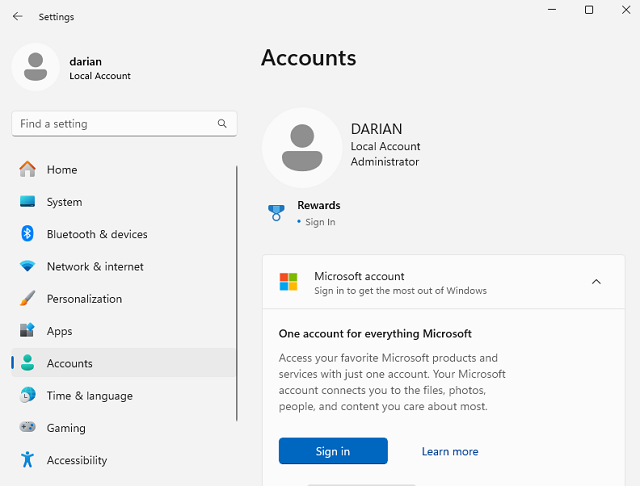
The ms-cxh protocol is an undocumented custom handler used by the OOBE web application and it offers a few shortcuts such as this. CXH seemingly stands for Cloud Experience Host.
Since it is undocumented, there are no guarantees that it will remain as a viable workaround in the future. But, for now, this seems like the best option for creating local accounts that works with the current Windows 11 release (for Home/Pro) and for the upcoming 26200 series build that is coming soon.
If you are running the Pro version, you can setup a local Active Directory account, but that is probably the last choice for most general users. If all else fails, sign in with a temporary Microsoft Account, then create a local admin user, logon to that local user and then delete the temporary Microsoft Account based user.