Many Delphi programmers are working on “legacy code” which has little or no tests and is often built and deployed manually. Unfortunately, many Delphi developers are stuck in this rut and could greatly benefit by upgrading their overall dev process. For many large projects, it is dismissed as being “too difficult” or “too risky” to even attempt to start the needed cleanup process. This reminds me of the question “How do you eat an Elephant?” and the proper response “One bite at a time!” Nothing is too difficult if you break it down into small bite size steps! That is exactly what we will attempt to demonstrate in this article as we’ll get a Jenkins server installed, a Delphi build machine created, fork a sample GitHub repository and automate builds and unit tests.
One of the first “bites” at solving this overall tooling issue is setting up your first build server. The most utilized build server today is Jenkins. There are other very popular options out there, and I plan to cover a few in upcoming articles, but Jenkins is still the king.

Jenkins has an automated setup process for Windows so you can get Jenkins installed in just a few minutes. Jenkins is also a Java application so it can be installed on nearly any platform. There is an enormous amount of documentation on Jenkins available, a huge community for asking questions, and it is just a natural first step to take to improve your development process. Since legacy Delphi developers are all using Microsoft Windows, we will cover the setup of Jenkins on Windows in this blog post.
Some Automation Topics
We will first quickly cover some general automation topics and later delve into the actual process of installing and utilizing Jenkins.
CI/CD and Jenkins
Before installing Jenkins, exactly what is it? I tend to reference it as build server, but it is much more than just that - Jenkins is an automation server as it can build, test, deploy, and automate much of the tasks around any project. It is also referred to as a CI Server for its ability to handle Continuous Integration tasks. This is the initial “build server” activity where the code base is built and tested automatically based on check-ins and/or on a scheduled basis. It is also referred to as a CD Server for Continuous Delivery or Continuous Deployment which are manual or automated deployments. These terms are generally combined as CI/CD as the goal is to automate as much of the overall process as you can. You utilize CI to build the artifacts deployed via CD. The building, testing, deployment, and monitoring of your applications are what make up your DevOps pipeline. Jenkins can be configured to handle simple builds or expanded to handle more complex pipelines. If you are just starting out with Jenkins, it is best to utilize simple build jobs and then migrate later to pipelines.
Trunk Based Development
If you are just starting out with CI/CD, then I highly recommend considering Trunk Based Development with only short-lived branches. This will simply your overall process and free you from merge hell. Many companies successfully utilize long running branches and still have a well-defined CI/CD process, but it is a little more complicated to pull off. Regardless of your branching strategy, a well-defined process for committing changes is required before automation can be successful. Formalize the process with a written document of understanding for all developers involved. An updated (or brand new) set of documentation targeted at your developers will be valuable when you start automating your builds and you should continually add to it as you improve your system.
Continuous Integration for Those Without Any Tests
If you are just starting out with Jenkins, and do not have any tests at all, you can still greatly benefit from Continuous Integration. In many shops, just getting the code to build on a regular basis is a large step forward. If you are in this position, start with the smallest project available and figure out what is needed to build that smallest of projects and add it to your documentation and test building it manually. You can then use Jenkins to automate the process so it is built periodically (at least once/day for most applications.)
The reasons may not be obvious just yet, but if you can get one project built automatically then you will get quicker feedback when someone eventually checks in code that breaks the build. The main fact for everyone to acknowledge is that, in general, the quicker you discover problems, the cheaper they are to fix.
Establish Command Line Builds for Every Project
If you are supporting an ancient product, you may be surprised to find how many different source code projects that you maintain! For every source code project that you support, you need to figure out how to build the project from the command line. Some projects may be only built from certain machines so you should document all project requirements and dependencies in a master list.
Once you can easily build a project, then you can quickly create a Jenkins job to have Jenkins execute that command line build. The next step would be to schedule that job to be executed automatically on a nightly basis and if any errors occur during the build you can send a notification message to the group regarding the failure. You will need to define the specific actions which are required to respond to build failures and update your developer documentation accordingly. It is highly recommended to immediately fix any build failures (due to the cost savings mentioned earlier.)
Once you get your first project built automatically, keep slowly adding projects to Jenkins until you have a comfortable grasp of how long your builds take and the availability of build machines. (Eat that elephant one bite at a time!) Eventually, all your projects will be built automatically every night (or how ever often you need to space out your builds based on build-machine availability and other project requirements.) You should celebrate once you achieve this major milestone! At this point, you will have successfully eaten a nice chunk of that elephant!
Automate Your Tests with Jenkins
Once you have a project being built automatically, you should introduce unit and integration tests as an additional code quality validation step. Ideally, you will end up with a suite of tests for every source code project being built. Once you have the tests built, and error notifications being sent, continue to update your developer documentation to define the actions to be taken when an error is received. TIP: If possible, define the actions to be taken within the notification message itself so the action to be taken is obvious.
You can spend a considerable amount of time creating tests for every project that you manage. The initial goal is to verify basic functionality. If you are just starting this process, don’t get trapped into the mindset that you need to create tests to validate every single line of code. Again, take a small bite - as getting a single test in place is far better than no tests at all. If you already have plenty of unit and integration tests, perhaps think about performance and load tests. There are a wide variety of testing techniques that you should consider adding to your automation process.
Tests are often broken down into Functional and Non-Functional types. Always start with the Functional Tests to “ensure it works” and then introduce related Non-Functional Tests to test the overall readiness of use. For example, if your software produces a report, first ensure the report properly displays the correct output. If your report can be run by at most 15 users at the same time, then develop a load test to ensure that at least 15 concurrent requests can be handled at once on hardware similar to your production equipment (while still displaying the correct output - do not let your performance tweaking kill your basic functionality.)
Getting Started with Jenkins and Delphi
Now that some of the basic information has been reviewed, it is time to dig into a little more detail with some screenshots and getting Jenkins running!
Decide on LTS or Weekly Updates
Jenkins follows a common trend in Enterprise Software which offers a Long Term Support (LTS) release version and other more frequently updated versions. There are many companies that prefer stability over new features so they would rather manage fewer updates. In you are in that group, you would select the stable LTS release of Jenkins. If you would like to get the latest and greatest that Jenkins has to offer, you will want to select the Weekly Release version.
Download Jenkins And Review Requirements
The latest LTS or Weekly Release of Jenkins is available on the Jenkins download page. There is a wide variety of options to select from on this download page. You can get installers for multiple platforms, get a Docker container image, or simply download the .war package files. They also provide links for deploying Jenkins in the cloud.
While you are on the download page, check out the Hardware and Software requirements for Jenkins. Note that since Jenkins 2.238 only .NET Framework 4.0 or above is supported for Windows service installations. (Older releases supported .NET Framework 2.0)
Also note the Browser Compatibility Page for Jenkins which lists Chrome, Firefox, Safari, and IE 11 as the main Level 1 targets as the Jenkins team proactively address issues for these browsers. Microsoft Edge is a Level 2 target which means it is a “best effort” situation to solve problems with that browser.
Finally, review the Java Requirements Page for Jenkins which lists Java 9, 10, 12 as not supported. They perform a full test flow for OpenJDK JDK / JRE 8 and 11 (64 bit) so these would be the suggested Java versions to target. You will get a warning if you run the controller or agent with an unsupported version. I use the AdoptOpenJDK installer for OpenJDK 11 (LTS) with HotSpot JVM for Windows x64. Note that some Jenkins documentation references Java Web Start and this technology was removed from Java distributions starting with Java 11. See a StackOverflow related question on the status of this. You will need to keep this in mind if you see Jenkins documentation referencing “JNLP” type URLs which auto-launch Java applets as that will no longer work as expected.
Jenkins is also available for easy installation via Chocalatey if you use that tool, but ensure that you review a currently open issue about upgrade failures with the latest package.
Decide Where to Install Jenkins server
Many developers simply install Jenkins on their main development machine for their own personal use and they launch the Windows Service utilizing their own Windows username so the Jenkins service has access to all their installed software. For dev teams, you will likely want to install Jenkins on a stand-alone server and install agents on build machines for distributed builds. You may also want to consider a cloud based installation. Many will all need to consider high availability options for Jenkins, which is typically solved by using a High Availability plugin from CloudBees.
Remember that if you will be using Jenkins with agents on different build machines, you will need to open a port on the firewall of the server running the Jenkins main controller. There is an option in the Installation process to automatically create a Windows Firewall rule that you can see in the screen shots below.
As a reminder for wherever you install Jenkins, you will want to ensure that you are backing up your Jenkins “Home” folder which contains your build job configurations and build history. There are a few plugins that can help with this task but be aware that some of the commonly referenced plugins have not been updated in a while.
Install Java
Before installing Jenkins, ensure your target server has Java installed as you will not be able to finish the install process without Java being detected on the system.
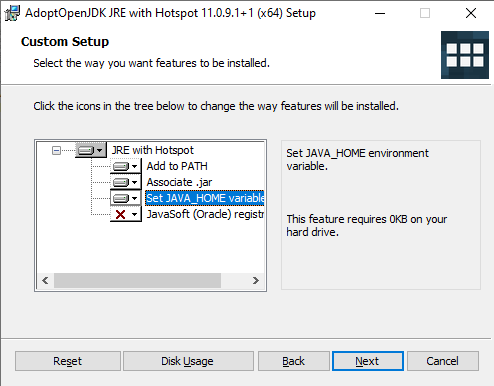
Note when installing Java via the AdoptOpenJDK installer select the option to “Set JAVA_HOME variable” so the Jenkins installer can find java.exe as this option is not selected by default.
You can easily verify if Java is installed by opening a command prompt and running the command to view the version number:
1
java -version
To verify the JAVA_HOME variable has been set, at a command prompt use the following command to view the current setting:
1
echo %JAVA_HOME%
Install Jenkins On Windows
The Windows installer (LTS or Weekly Release) is jenkins.msi and it involves only a few screens and typically takes just a minute or two to complete. Once the Windows installer finishes, the installer will launch a web browser to connect to Jenkins and complete the installation process.
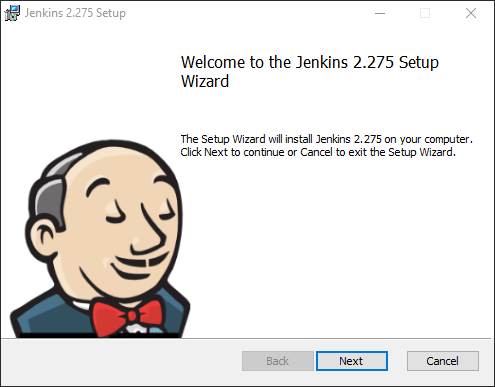
When the installer is launched, a simple welcome screen is presented to start the setup wizard. Verify the release number displayed and click on Next to continue. (I am currently using Jenkins release 2.275 which is the latest Weekly Release as of today.)
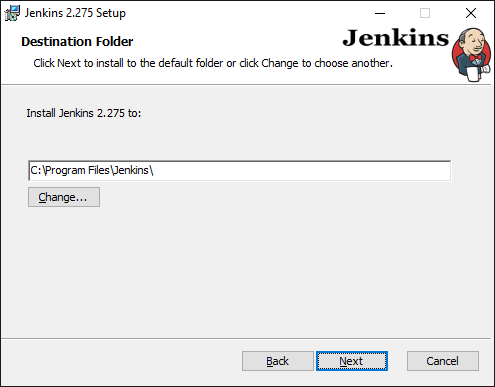
The next step in the install wizard process is to select the destination folder for the Jenkins application files (which includes jenkins.exe, Jenkins.war, and jenkins.xml. There will also be a few log files created in this folder.) Note that the main data files will be stored in a different folder based on the user that launches the Windows Service. This application folder contains less than 70 MB worth of data so you can normally keep the default folder unchanged: C:\Program Files\Jenkins and click on Next to continue.
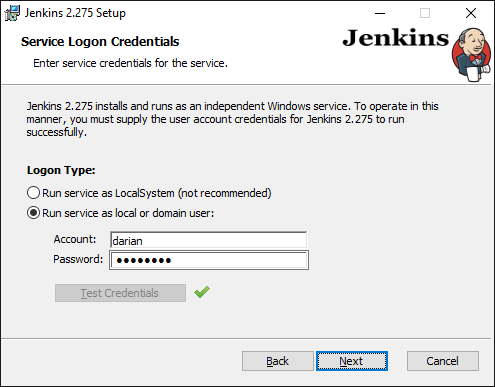
Next, you need to define which user will launch Jenkins as a Windows Service. You can run the service as LocalSystem or enter in a specific Windows account and password. If you are going to run build jobs on the main controller machine, this account needs access to the tools required to build your applications. For example, if you are installing Jenkins on your Delphi machine, input your own username and password to utilize your copy of Delphi on the machine.
If you do not need to run build jobs on this machine, you could easily select the option to “Run service as LocalSystem” to run the Windows Service - just note that the Jenkins data files will be stored in C:\Windows\System32\config\systemprofile\AppData\Local\Jenkins by default which is typically not a good idea. It is usually a better idea to utilize a dedicated user account for launching your service.
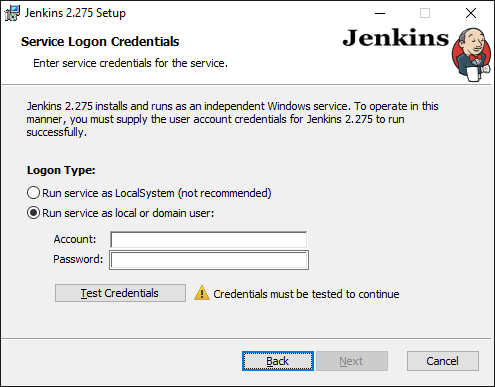
If input a specific user account, then that account needs to have Logon as a Service privilege assigned to it. The installer wizard requires you to click the Test Credentials button before continuing and you will get an error if the selected account fails to pass this validation test.
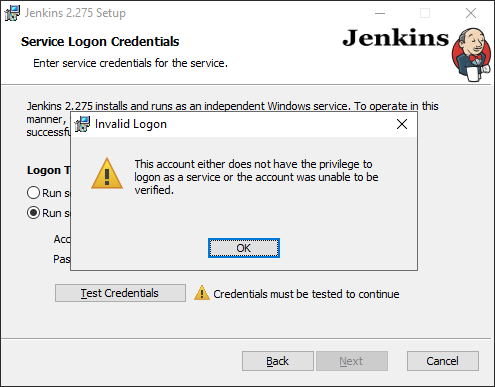
You can ask your domain administrator to do this, or if you want to change this locally in Windows 10, run the Local Security Policy application and in User Rights Assignment under Local Policies, find “Log on as a service” and double-click it to bring up the list of users allowed. Click the “Add User or Group…” button to add your user account.
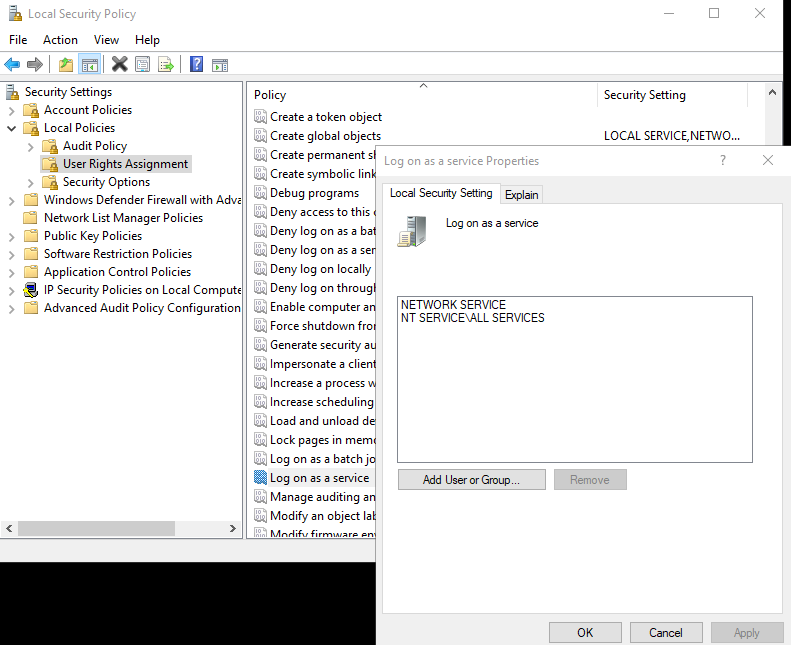
Once your user account as the Logon as a Service policy applied, click on the Test Credentials button in the Jenkins setup and it should now show a green checkmark on success and you can hit Next to continue.
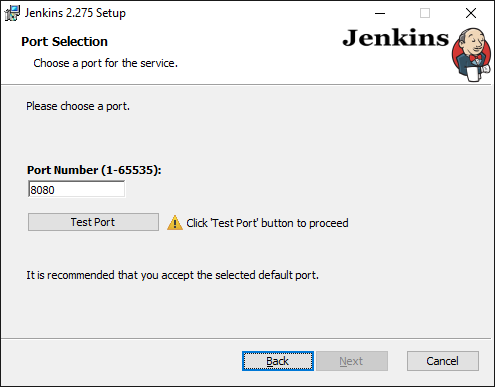
The next choice to make is the webserver port number that the Jenkins controller will utilize and it defaults to port 8080. You will need to click the Test Port button to ensure that the port number is not already in use before continuing with the installation wizard by clicking on Next.
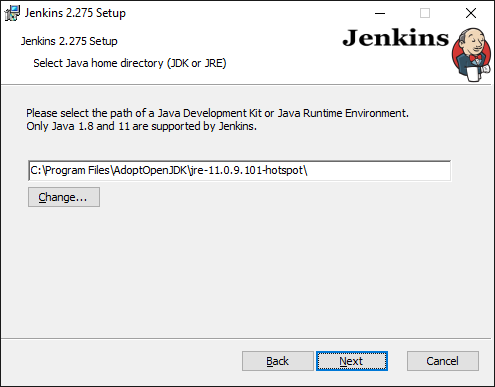
Next, you will need to select the Java path which Jenkins will use. The installer automatically searches the system and defaults the path for you if Java is found. Note that if Java is not found, ensure the JAVA_HOME environment variable is defined. Verify the desired path and click on Next.
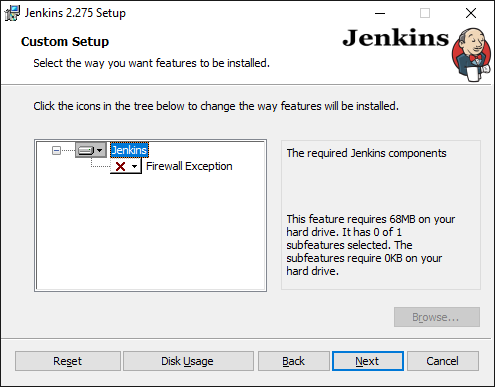
Finally, you can optionally have the installer configure the Windows firewall to allow inbound connections to the port number which you selected earlier. This will create a new firewall rule named “Jenkins” allowing connections to the configured java.exe program for inbound traffic on your configured port.
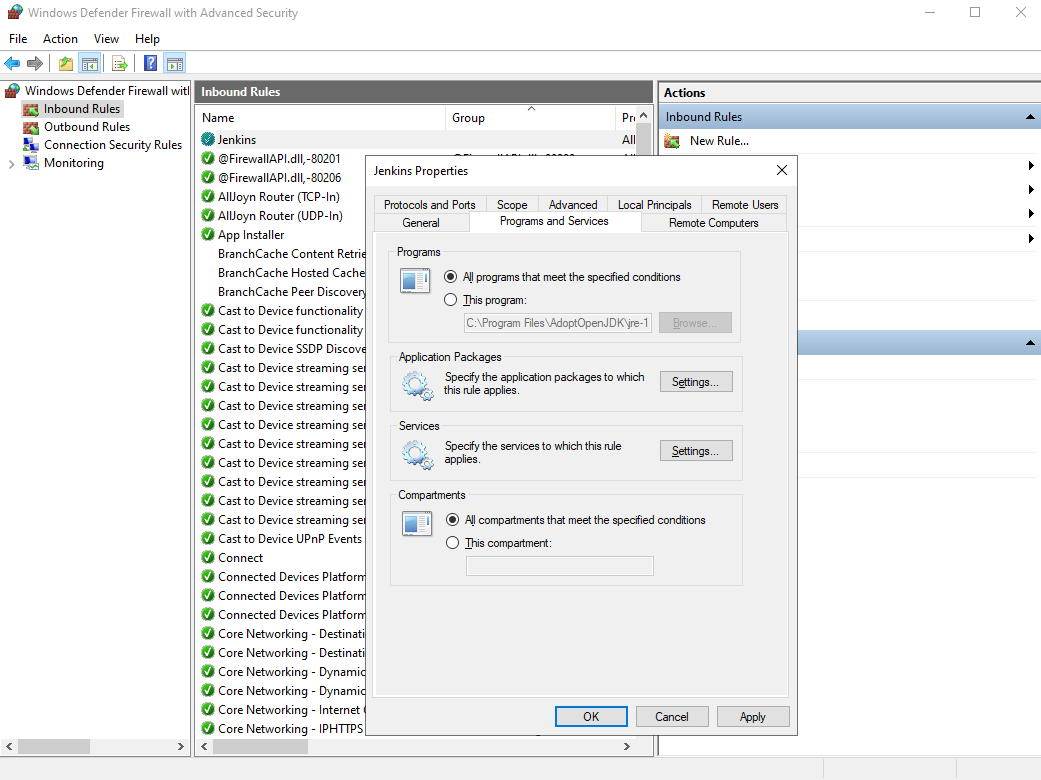
On Windows 10, you can review and edit this new Inbound Rule in the Windows Defender Firewall with Advanced Security application. (Note that I had to change the new rule’s “Program and Services” configuration from the defined java.exe program to “All programs that meet the specified conditions” as my remote Agents could not connect until this firewall rule was modified and the Jenkins service restarted.)
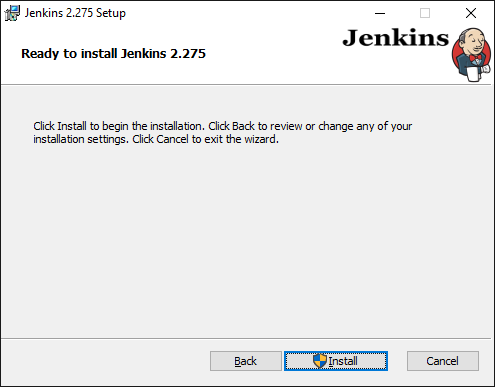
The installer is now ready to begin the Jenkins installation! After clicking on the Install button, UAC will prompt you to allow it to continue and you will be able to verify the publisher certificate.
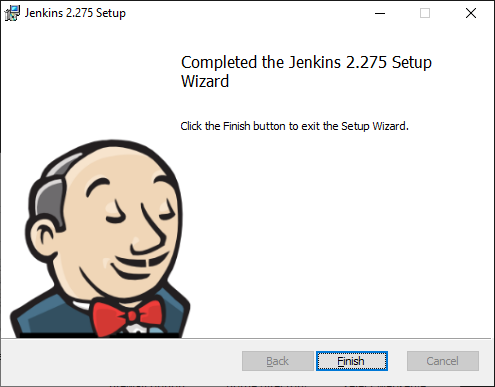
After a very quick install process (taking a few seconds on my machine), you will be prompted to Finish the Windows installation wizard.
After the initial wizard closes, your default browser will appear displaying the Jenkins “Getting Started” browser-based wizard to finish the installation process. On slower machines, this may take a minute or so before the Jenkins system is ready to continue. You can restart this browser session by visiting http://localhost:8080 (or whatever port number you configured in the setup process.)
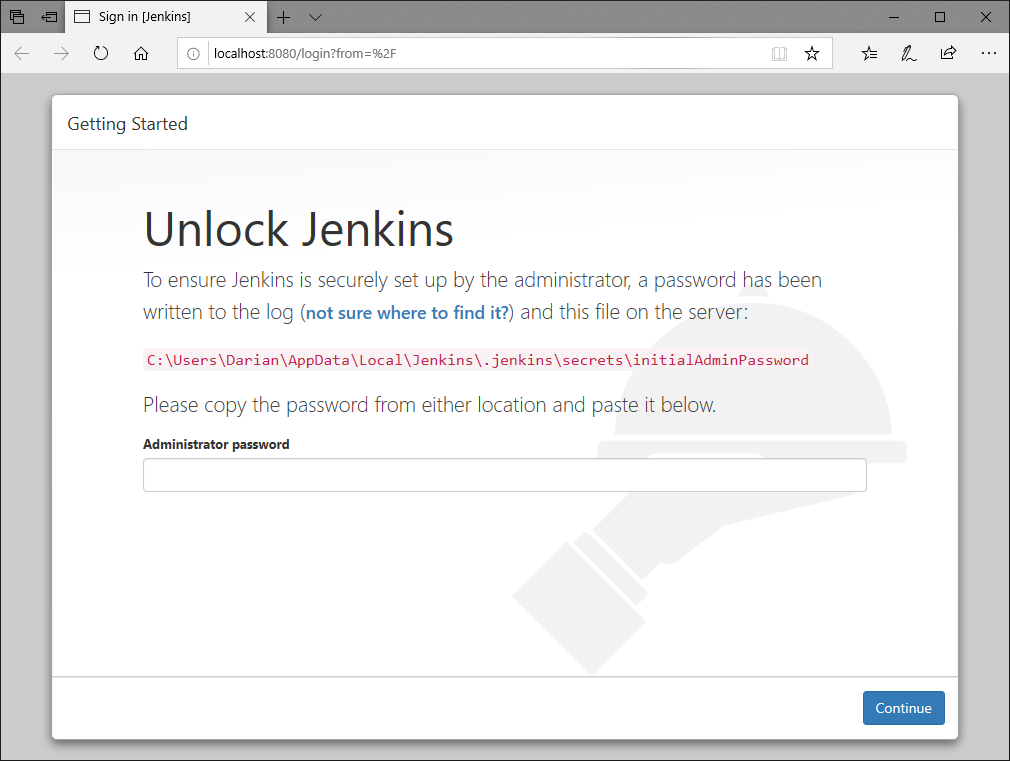
The first step in the browser wizard is to Unlock Jenkins. This is a security check to ensure that whoever is running the browser wizard has full access to the local system. You will be provided with the full path of the initialAdminPassword file and you will need to input the contents of that file and then click on Continue. The contents of the file is a single line of text like e83877c976f44fbf9c959c85c8a5f591. Note this is also the assigned password for the Jenkins “admin” user account, so keep it secret, keep it safe.
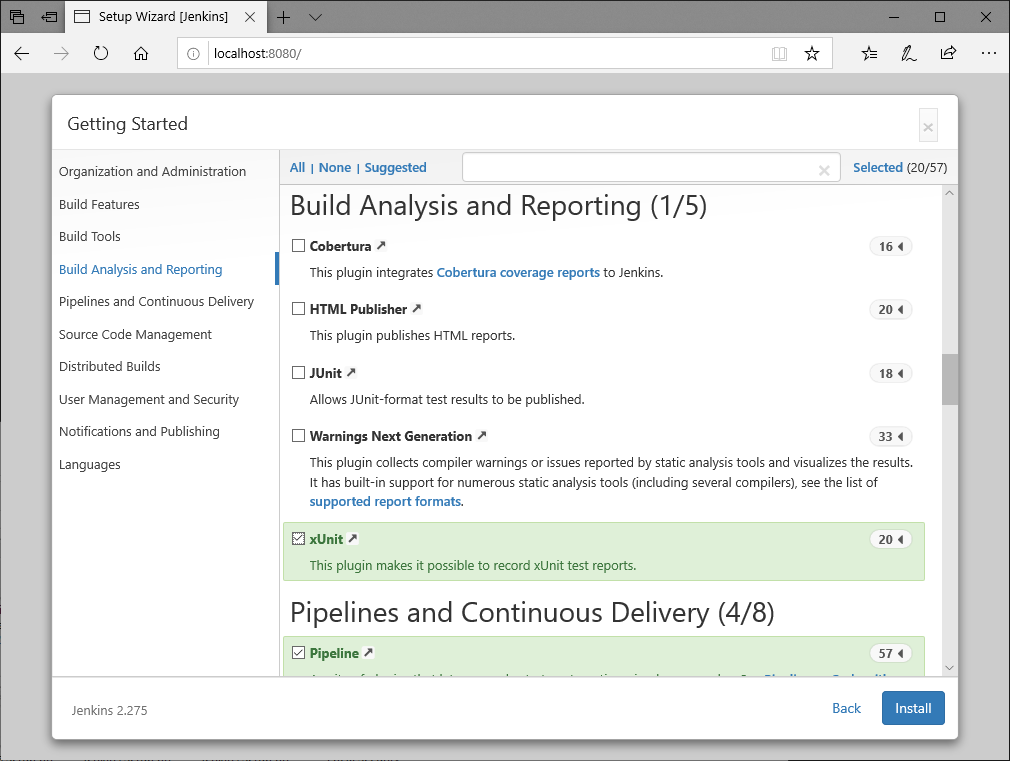
You are then given two options to Customize Jenkins. You can install the recommended set of plugins or manually select which plugins are installed. Click on the second option to customize the plugins as we will be adding a couple of plugins for our use with Delphi.

A list of plugins is displayed with the recommended plugins already pre-selected. Scroll down and select the xUnit plugin. Also review the Source Code Management plugin options and select your desired version control plugins. If you are going to follow along and use the samples provided, ensure the Git plugin is also selected. Click on the Install button when you are ready to continue the process of configuring the Jenkins server.
Note that you can always add or remove plugins later by using the Manage Plugins menu option within the Manage Jenkins screen available from the Jenkins Dashboard.
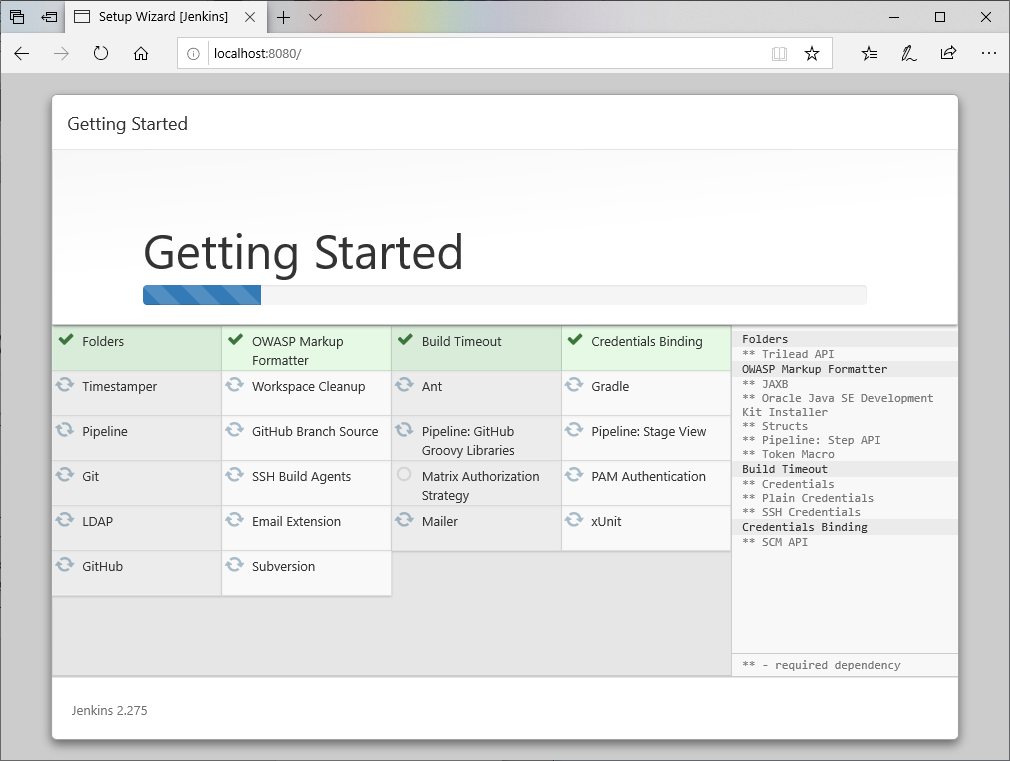
The browser wizard will install all selected plugins before continuing. This will take a little time to complete (on my system it took about 2 minutes, but it depends on the number of plugins you are installing and their required dependencies.)
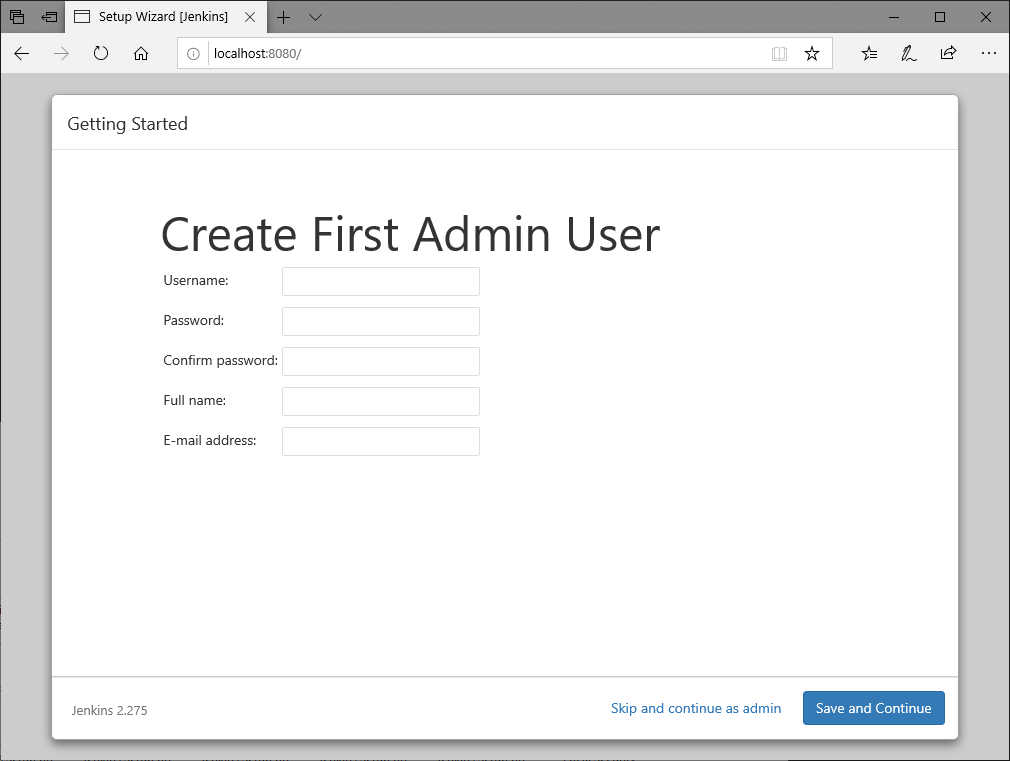
You will then be presented with the option to Create First Admin User. Enter in your desired username and password along with full name and email address. When ready, click on the Save and Continue button. Note that you can skip this step if you want to continue and use the default admin account and setup other users later.
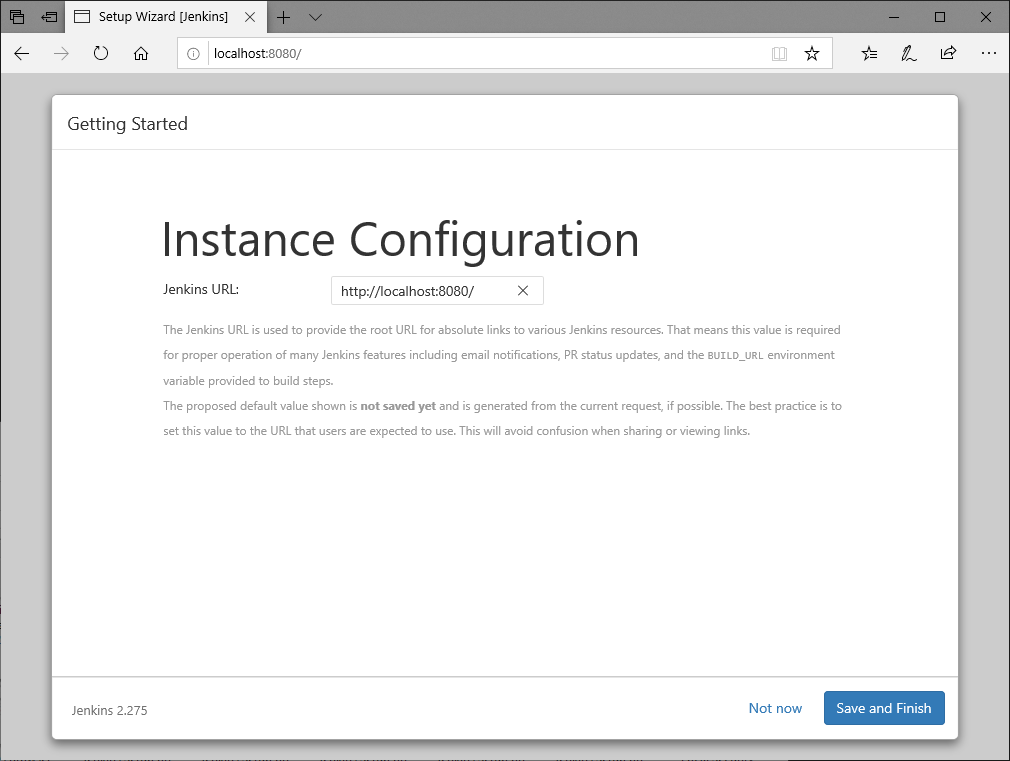
Finally, you will be prompted to modify the Instance Configuration. If you have a custom host name for the server Jenkins is being installed on, enter it here. At minimum, change the default localhost to the IP address of the server if you are going to be accessing it remotely. Click on the Save and Finish button when done.
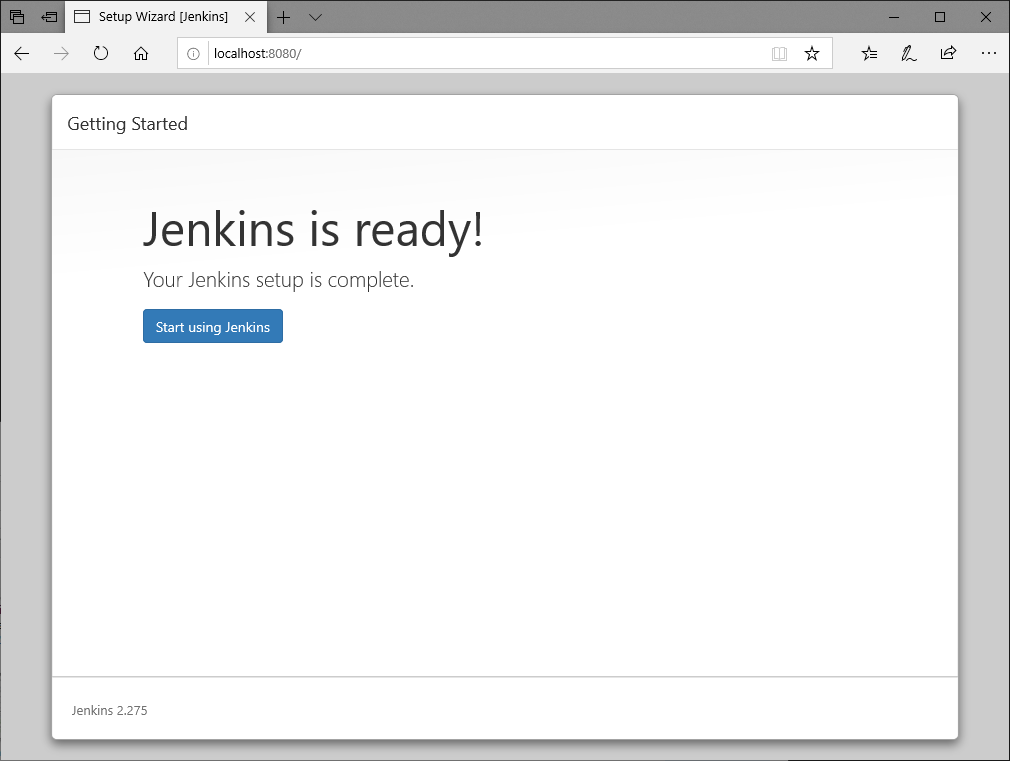
Jenkins is now setup and ready to be used! Click on the Start using Jenkins button to complete the browser wizard.
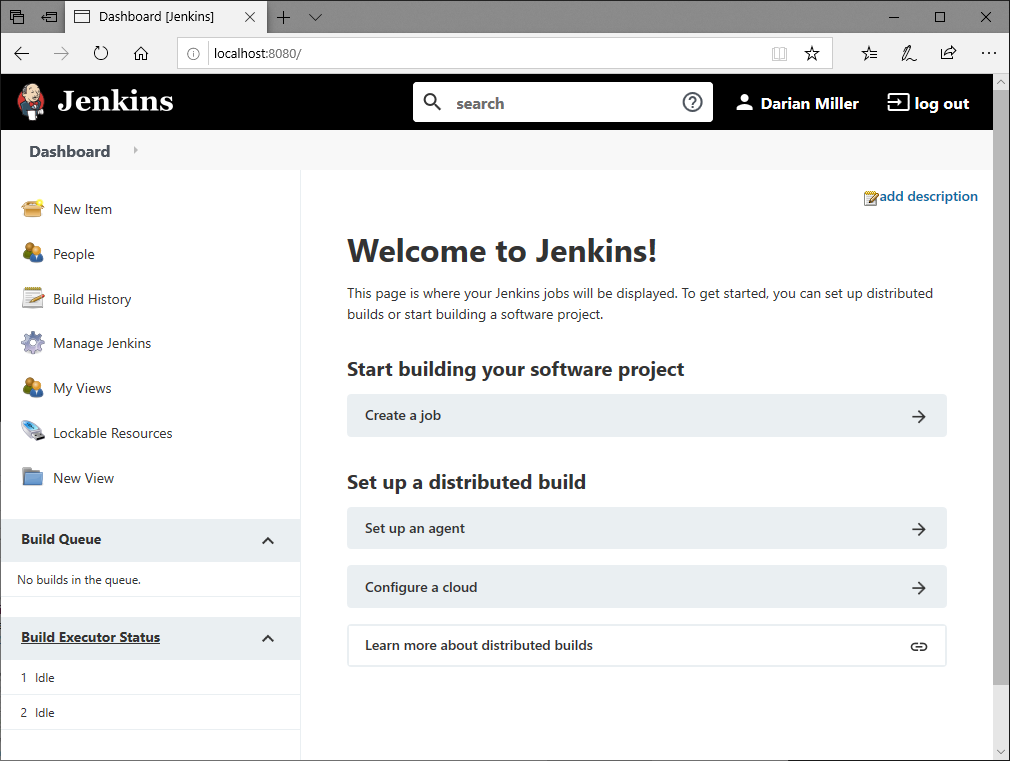
You should be presented with the main Jenkins Dashboard. You can access this at any time using the URL defined in the Instance Configuration. You will be prompted to logon with your username and password as needed when revisiting the server.
Note: if you will be using Git in your jobs, ensure you that Git For Windows is also installed on your Jenkins server.
Configure A Delphi Build Agent
You can install an Agent on the machine that you use Delphi on today, or you can create a dedicated build machine which we will do for this example. (Skip this step if you want to use your currently configured Delphi machine to act as your build agent.) Note that your Delphi license allows you to copy these files to a separate computer only for the sole use of performing automated builds.
Copy Delphi Files to The Build Machine
On our target build machine, create a folder called C:\Delphi10.4. Copy the following folders from the machine where Delphi is installed to this target folder (excluding platforms that you do not need on the build agent if desired.)
C:\Program Files (x86)\Embarcadero\Studio\21.0\bin
C:\Program Files (x86)\Embarcadero\Studio\21.0\bin64
C:\Program Files (x86)\Embarcadero\Studio\21.0\lib
Also make a copy of EnvOptions.proj from %APPDATA%\Roaming\Embarcadero\BDS\21.0
Customize Build Machine Paths
Edit C:\Delphi10.4\bin\rsvars.bat and change the paths to match the paths on this build machine, something like the following example:
1
2
3
4
5
6
7
8
9
10
11
@SET BDS=C:\Delphi10.4
@SET BDSLIB=C:\Delphi10.4\Lib
@SET BDSINCLUDE=C:\Delphi10.4\include
@SET BDSCOMMONDIR=C:\Delphi10.4\public
@SET FrameworkDir=C:\Windows\Microsoft.NET\Framework\v4.0.30319
@SET FrameworkVersion=v4.5
@SET FrameworkSDKDir=
@SET PATH=%FrameworkDir%;%FrameworkSDKDir%;C:\Delphi10.4\bin;C:\Delphi10.4\bin64;C:\Delphi10.4\cmake;%PATH%
@SET LANGDIR=EN
@SET PLATFORM=
@SET PlatformSDK=
Copy the EnvOptions.proj file to the APPDATA folder of the user account which will execute the builds. (For example: C:\Users\JenkinsUserName\Roaming\Embarcadero\BDS\21.0) If you have custom paths for libraries and component packages, edit the DelphiLibraryPath for each target platform that you will use to match your build machine paths. You will get a warning message in your builds if this file is not found, something like the following:
1
Expected configuration file missing - C:\Users\YourName\AppData\Roaming\Embarcadero\BDS\21.0\EnvOptions.proj
Ensure Prerequisites Are Available
Since we are typically installing only on Windows 10 today, you should not need to install the .NET 4 Framework as MSBuild.exe will be available. You do need to ensure Java is installed, and you can use the same AdoptOpenJDK installer as used above. Also, for our example project demo, Git will be needed by the Agent to check out files from GitHub, so install Git For Windows as required.
Include Third Party Components
Managing the components used by applications can be a chore in Delphi. While it can be simple on the build machine to copy the needed source and BPLs for third party components, some may need special installation and licensing requirements. Proper component management is an entirely different elephant to eat (and for a different blog article.)
Note: if you will be using the command line compiler to build Delphi projects, ensure you update the dcc32/dcc64.cfg files in the Delphi10.4\Bin folder as stated within the dedicated build machine link above.
Define a New Node in Jenkins
Note: if you have installed the Jenkins service directly on your Delphi machine, you can skip this step as you will not be needing distributed builds.
Now that we have a Jenkins automation server up and running, lets create an Agent node for building our Delphi projects. From the main Dashboard in Jenkins, select the Manage Jenkins option to bring up the various configuration screens as shown below.
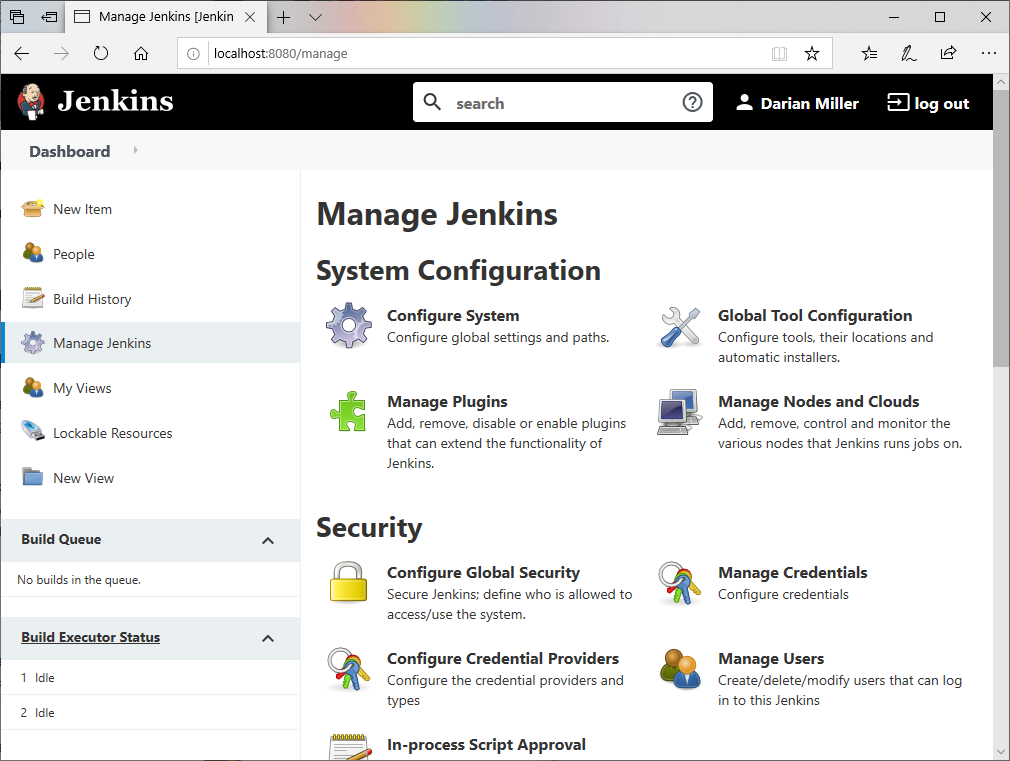
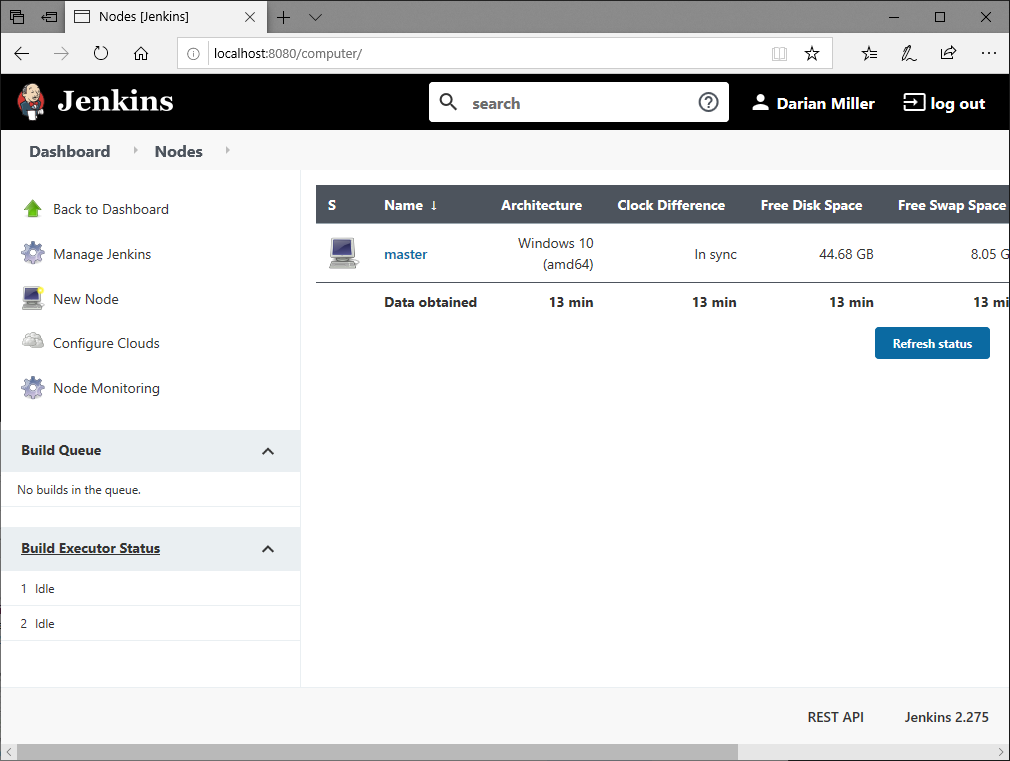
While in the Manage Jenkins screen, click on the Manage Nodes and Clouds option under the System Configuration section. This will initially list only the master controller node as shown below.
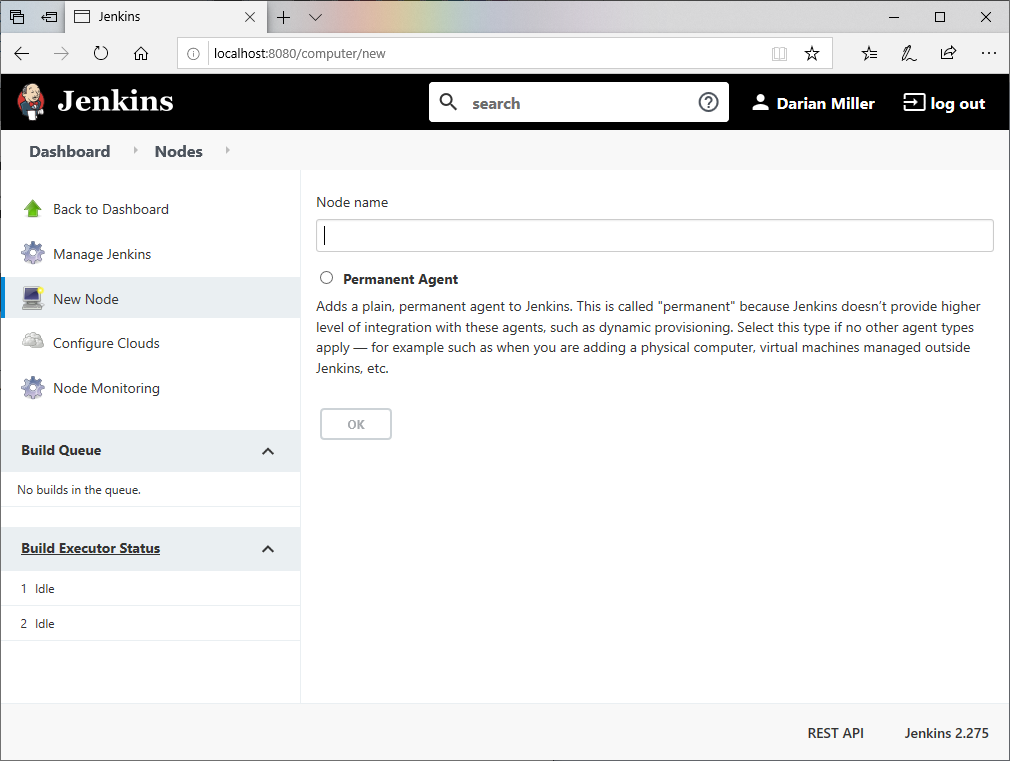
| Click on the New Node option to define a node for our first Delphi build agent. You will initially be prompted to enter a Node name. Typically, you would use the Windows computer name within the Node name element, but it is up to you to define the convention you want to use. For this example, we will use a Node name of Delphi1. You will need to ensure that each Node name is unique for this server. (Note there are some naming restrictions as you cannot use any characters from this list: **?*/\%!@#$^& | <>[]:;) Select the **Permanent Agent option and then click the OK button to continue. |
Next, you will be presented with a full screen of options for configuring the Jenkins node. The only required item to specify is the Remote root directory which is the directory on the build machine where the Jenkins agent will be installed (in our example, set this to C:\JenkinsAgent.) Note: whatever folder you specify here should be dedicated for use by Jenkins on this machine.

Note that the # of executors item is the maximum number of concurrent builds that Jenkins will start for this build agent and it defaults to 1. If you are actively using this machine for your day to day development work, and simply running the Jenkins agent in the background as a service, you will probably want to keep this at its default value to not lag your machine while you are working. For a dedicated build machine, you can ramp this up with a suggested value matching the number of cores on the machine.
Configure the Labels item to establish the available capabilities of this build machine. Since we will be using Delphi 10.4 on the machine, input delphi10.4 and in the Usage configuration item, select “Only build jobs with label expressions matching this node” to only work on Delphi related jobs on this agent.
In the Launch method configuration ensure “Launch agent by connecting it to the master” is selected. You can optionally define a Custom WorkDir path if you want to put the temporary workspaces in another folder outside of C:\JenkinsAgent. You can also leave the Internal data directory at the default value of remoting or rename it as desired. (This folder will contain log files and a jar cache.) Finally, select the Use WebSocket option to use the main port number of the server (8080 by default) for the agent to communicate with the server (if you do not use WebSocket, you will have to open up an additional port number in your firewall on your server and set the TCP port for inbound agents option in the Configure Global Security in settings to establish the port number the agent needs to use.)
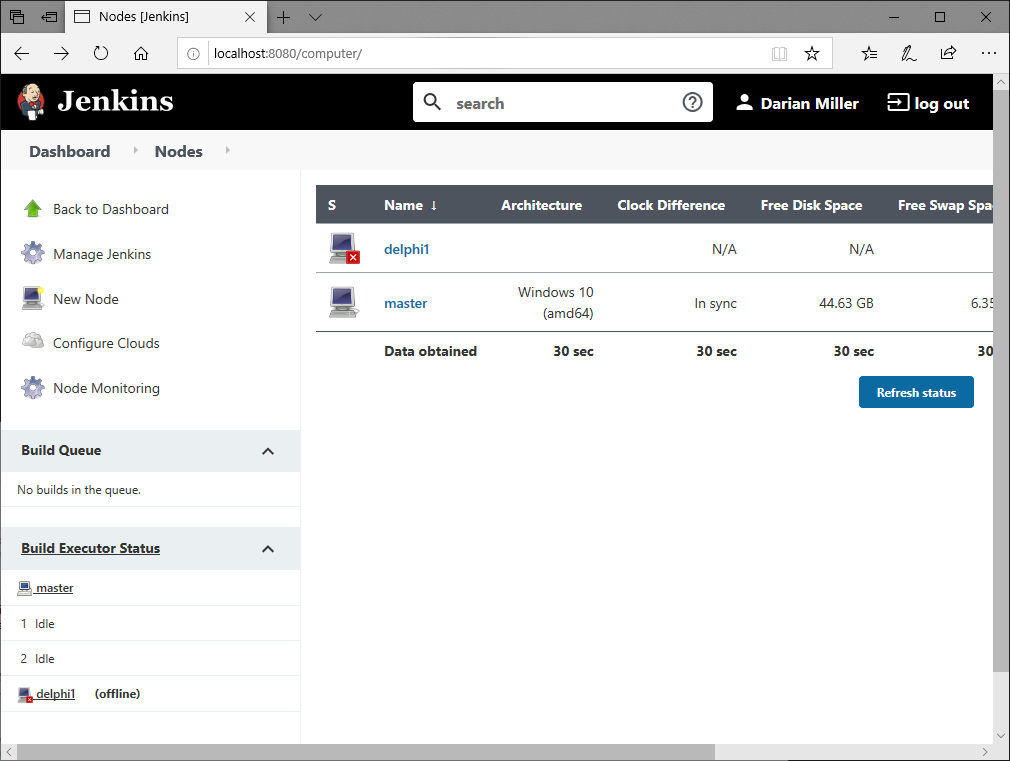
Once you click the Save button on your node configuration screen, you will be presented with the list of nodes. Your new node will have a red X marker signifying that it is not connected to the server. We will correct that next by installing the Jenkins Agent as a Windows Service on the target machine.
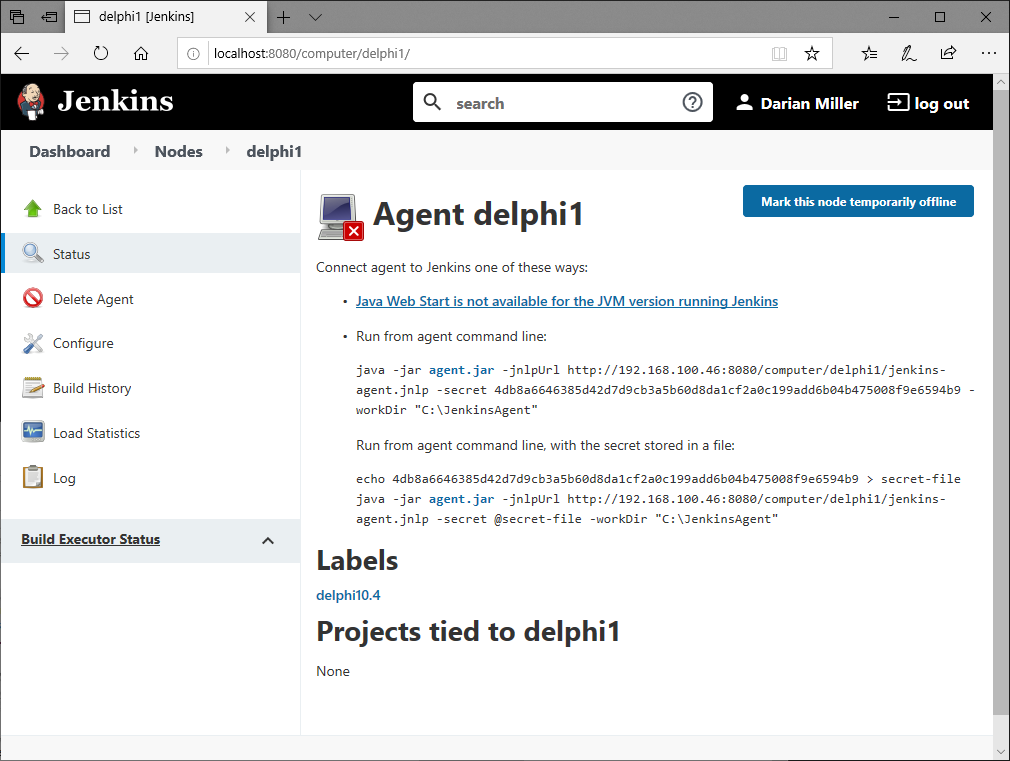
Click on your new agent in the list to view its Agent Status Screen. Since it is not connected, this screen will show the needed java command to connect to the server from the agent, including the node’s unique secret key needed to validate the connection.
Note: after manually downloading the agent.jar file from your server by clicking the agent.jar link, you could manually connect your Jenkins Node to the server by running the java command displayed. Of course, we should not rely on manual operations, so we will cover installing Jenkins as a Windows Service below.
Key point: after you have one or more Agent nodes configured, your job configuration screen will include the new option to “Restrict where this project can be run” which allows you to configure Label Expressions to run the job on specific nodes as you can utilize labels in Jenkins as build machine requirements.
Notes on Java Web Start (JNLP)
Historically, Windows based Jenkins nodes relied on Java Web Start for an easy initial setup and that technology was deprecated in 2017. While using AdoptOpenJDK, in the Agent Status Screen above you can see a link displayed which states “Java web Start is not available for the JVM version running Jenkins” and it is currently a redirect to the Wikipedia page discussing its deprecation. Jenkins documentation fails us here as they have a page dedicated to a Step by step guide to set up master and agent machines on Windows but it is incomplete and sorely out of date. Another related Jenkins page for Installing Jenkins as a Windows Service which also references agent nodes is also a few years out of date. Unfortunately, the distributed builds page in their latest documentation project on GitHub has not even been started. If your version of Java supports JNLP then you may refer to the previous links and might get your node easily installed. For all those users without JNLP support, with a little help from Google and some experimentation, what follows is how I managed to get a Jenkins agent installed on Windows.
Notes on WinSW
First note that Jenkins.exe is a special type of executable. It derived from a stub program that can be used to launch any Java application as a Windows Service: Windows Service Wrapper (referred to as WinSW) and is currently being maintained by Oleg Nenashev. Jenkins hosts versions of WinSW on their releases repository site with the latest version currently being 2.9.0. (Note that you can reference WinSW GitHub Issue 523 for reasons behind the various executables in each release folder.)
By default, when WinSW is executed it looks for a configuration file based on the executable’s base name with an .xml file extension. This configuration file controls the behavior of the Windows Service and documentation can be found on GitHub. (If desired, you can also pass in a different config file to be used as a parameter to WinSW.)
You can also define a second .config file which is sparsely documented by WinSW for defining startup options. This is a .NET framework configuration file. (You could use this, for example, to ensure that a .NET 4 runtime is available before starting the service.)
Knowing that you can run the Agent manually by a simple Java command, paired with a utility service which can run any Java application as a Windows Service, you should see where we are going with the next step.
Manually Install Jenkins Agent on Windows
Decide where to put the Jenkins agent on your Delphi build machine - ensuring you will have enough disk space for a LocalCache directory to keep copies of the project source code and for building the various projects.
For this example, we will make a directory called C:\JenkinsAgent on a machine which will have access to Delphi 10.4 Sydney and Java. (Note: this directory needs to match the Remote root directory as defined in the previous Node setup on the server.) You can download winsw-2.9.0-net4.exe from the WinSW release site, or simply make a copy of the Jenkins.exe from your main server to place in this folder (C:\Program Files\Jenkins\jenkins.exe by default.) Either way, save the WinSW executable with a custom name like jenkins_agent.exe (or whatever name you prefer.) Create a text file with the same base filename and an xml file extension (jenkins_agent.xml) and populate it with the following configuration as a starting point.
1
2
3
4
5
6
7
8
9
10
11
12
13
14
15
16
17
<service>
  <id>JenkinsAgentForDelphi</id>
  <name>Jenkins Agent</name>
  <description>This service runs a distributed build server Agent for the Jenkins automation server.</description>
  <env name="JENKINS_HOME" value="%BASE%" />
  <executable>C:\Program Files\AdoptOpenJDK\jre-11.0.9.101-hotspot\bin\java.exe</executable>
  <arguments>-Xrs -Xmx256m -jar agent.jar -jnlpUrl http://YourHostName:8080/computer/YourNodeName/jenkins-agent.jnlp -secret 24bf7a5c4f6b3cc063d124776347fad67f992b0a2f4a493752d3cf707ec560ce -workDir %BASE%"</arguments>

  <log mode="roll-by-size">
    <sizeThreshold>25600</sizeThreshold>
    <keepFiles>4</keepFiles>
  </log>

  <onfailure action="none">
    <download from="http://YourHostName:8080/jnlpJars/agent.jar" to="%BASE%\agent.jar" />
  </onfailure>
</service>
Note: you will need to edit this sample configuration to match your specific deployment values.
The id of the agent should be a unique Windows Service name on the build machine and can be changed if desired.
You can alter the service name and description elements as you see fit, but Windows does require the service name to also be unique on the machine. (Note: the name value is typically what you search for in the Service Control Manager screen.)
You should change the executable element to match the path of the version of Java on your build machine.
There are a few items you will need to tweak in the arguments element. You should change the two YourHostName sample values to the IP address or hostname of your Jenkins automation server installed earlier. If you used a non-standard port number on your server, replace the two 8080 default values. Also change the sample YourNodeName value to match the value of Node name as you defined on the Jenkins server node configuration (in our example, Delphi1.) Finally, replace the sample secret value to the secret key displayed on the Agent Status Screen.
You then need to register this service with Windows so it starts up automatically. This is accomplished by running the WinSW executable with an install parameter. From a command prompt in the C:\JenkinsAgent folder execute the following command to install the service (you will be automatically prompted by UAC as required):
1
jenkins_agent.exe install
Note: you can easily uninstall the service with a similar command
1
jenkins_agent.exe uninstall
To complete the setup of this Jenkins Agent, you typically need to modify the account which the Windows Service will utilize while running. (The service will run under the Local System account by default.) Launch services.msc to bring up the Windows Service Control Manager application and find your new Jenkins Agent named service in the list. Double click the service to bring up its properties and then click on the Log On tab to configure a specific account to use to launch the server. If this agent is on your personal Delphi work machine, then input your username and password to run Delphi under your account. While in the SCM, in the General tab click on the Start button to initially start the Jenkins Agent. This will launch the WinSW application and download the agent.jar from the server as needed before launching the app with java.
After a few seconds, you should be able to refresh your Agent Status Screen on your Jenkins server and see the status as “Agent is connected.” (Tip: if you need access to your Agent’s secret key in the future, stop the Jenkins service on the agent and refresh the Agent Status Screen on the server to see the java command needed to connect which includes the secret key.)
Checkpoint: If you already have Delphi installed on your agent, your Jenkins Agent should now be fully configured for use as an automated Jenkins build machine!
Turn Off Builds on Your Jenkins Server
If you are using distributed builds, you probably do not want to have your main Jenkins controller completing any build jobs on its own. You can easily accomplish this by setting the number of Executors on the server to 0. You will find this setting from the Dashboard in the Manage Jenkins section under the Configure System option. Simply change the default Executors setting from 2 to 0 and hit the Save button and your Nodes will do all the build work. Refer to the Jenkins documentation on considerations for large scale Jenkins deployment for some further discussion. If your Jenkins server strains under load, review a tuning article from CloudBees.
Note: you may want to run jobs on the server for maintenance tasks. In this case, leave the Executors option alone and input a Label for your build server in this same screen so that the server will only run jobs configured for this capability defined. (For example - enter jenkinscontroller in the Labels configuration and use that label in all jobs which should execute on the server.)
Notes on Using MSBuild on Delphi Projects
Delphi makes command line builds easy by creating a batch file called rsvars.bat during the install process which configures your environment for command line builds.
An example rsvars.bat from my 10.4 Sydney installation follows. You can see that it sets up some environment variables and modifies the PATH to ensure that Delphi executables can be found:
1
2
3
4
5
6
7
8
9
10
@SET BDS=C:\Program Files (x86)\Embarcadero\Studio\21.0
@SET BDSINCLUDE=C:\Program Files (x86)\Embarcadero\Studio\21.0\include
@SET BDSCOMMONDIR=C:\Users\Public\Documents\Embarcadero\Studio\21.0
@SET FrameworkDir=C:\Windows\Microsoft.NET\Framework\v4.0.30319
@SET FrameworkVersion=v4.5
@SET FrameworkSDKDir=
@SET PATH=%FrameworkDir%;%FrameworkSDKDir%;C:\Program Files (x86)\Embarcadero\Studio\21.0\bin;C:\Program Files (x86)\Embarcadero\Studio\21.0\bin64;C:\Program Files (x86)\Embarcadero\Studio\21.0\cmake;C:\Users\Public\Documents\Embarcadero\InterBase\redist\InterBaseXE7\IDE_spoof;%PATH%
@SET LANGDIR=EN
@SET PLATFORM=
@SET PlatformSDK=
After executing rsvars.bat, you can build a Delphi project by simply executing “MSBuild projectname” within the same directory as the project file. You can also customize the build process by passing parameters to MSBuild. We can use this information to create a new BuildDelphi10.4.bat which contains the following commands:
1
2
3
call "C:\Program Files (x86)\Embarcadero\Studio\21.0\bin\rsvars.bat"
cd /D %1
msbuild %2 /t:build /p:Configuration=%3 /p:platform=%4
Note: this example batch file works for machines with Delphi 10.4 Sydney fully installed, but for a dedicated build machine that we manually created by copying the Bin and Lib folders, change the path to the modified rsvars.bat as needed.
This batch file expects the working folder as the first parameter, the project file name as the second, the config profile as the third and the platform as the fourth. We will create a Jenkins job to call this batch file with these four parameters to build our Delphi project. (Note: if you have complex build requirements and want to be able to easily debug command line builds then I would highly recommend you purchase FinalBuilder as it is the ultimate tool for building Delphi projects. VSoft Technologies also offers a strong Jenkins alternative in their Continua-CI product which will likely be covered in a future blog post.)
Configure Your First Delphi Build Job
Note: in order to follow-along with our sample project, you should fork this public GitHub repository and clone a copy on your machine where Delphi is installed: https://github.com/ideasawakened/delphi-automation-sandbox.
Review and edit the Delphi10.4.bat file for the location of Delphi on your build Agent machine and commit your change into your repository as needed.
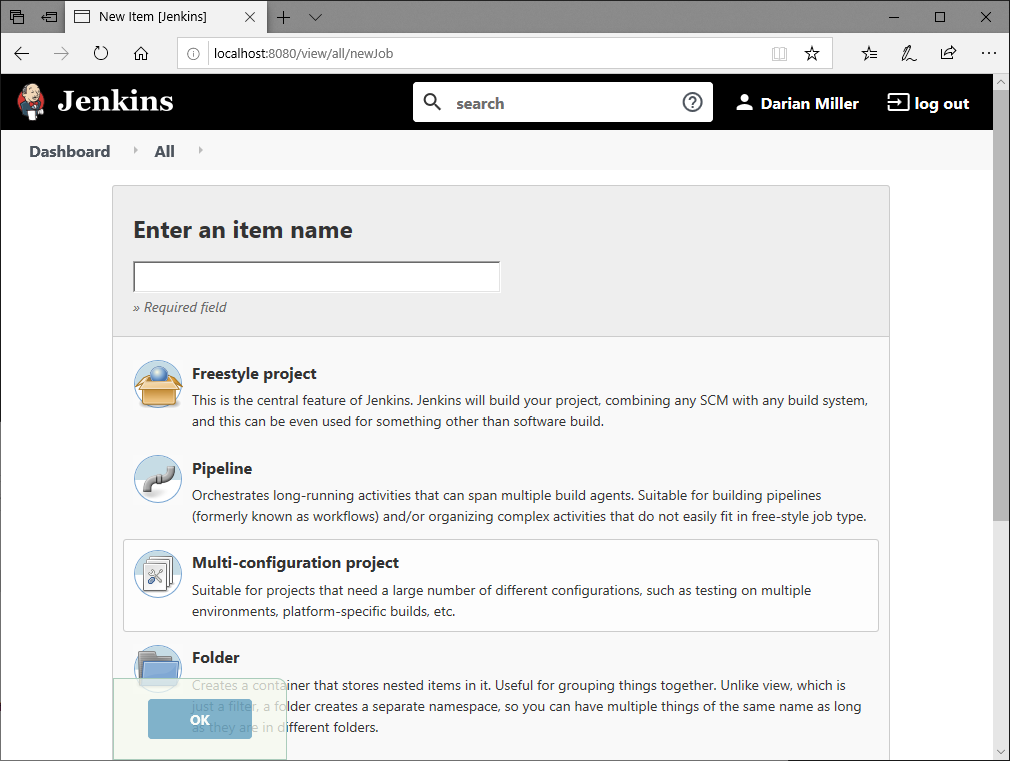
From the Jenkins Dashboard, click on the New Item menu item. This will bring up a list of item types to select from and prompts you to enter in your item name. We will use something like Delphi Hello World for this example, then select Freestyle project, and click on OK.
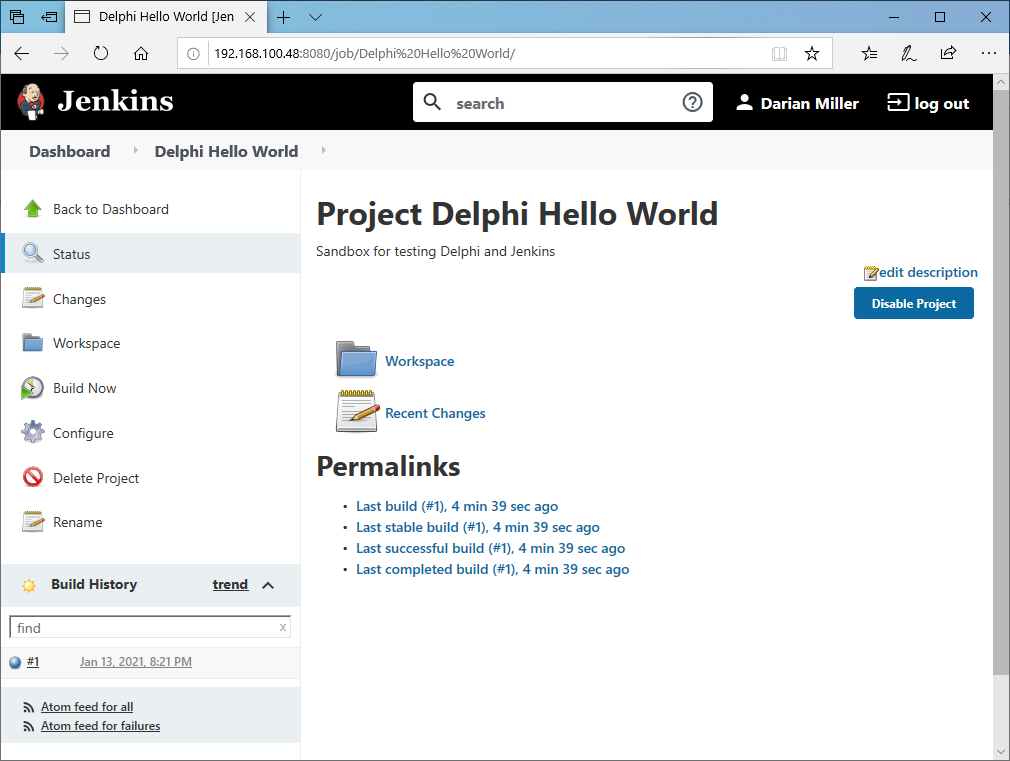
The next screen displayed is your main project configuration screen. You can enter in any sort of description that you like - we will use Sandbox for testing Delphi and Jenkins.

If you are leveraging distributed builds and have at least one Agent node defined you can modify the Job configuration by checking the option Restrict where this project can run and then customize the Label Expression to be delphi10.4 to match the Agent node’s label. Note this expression is case sensitive and the edit box does have autocomplete enabled. If you do not have any Agent nodes defined, then this job will be built on the Jenkins server and this option will not be displayed in the config screen.
Next, we will configure the Source Code Management section to define where Jenkins will access the source code for our Delphi project. Select the Git option and enter in your cloned URL of the delphi-automation-sandbox repository. If it is a public repository, no Credentials are needed.
Within the Branches to build section, you will need to change the default */master branch to */main to match the latest default branching terminology being used by GitHub.
Note: if we save this project now and build it, Jenkins should successfully clone the repo in the working folder on the agent. You can do this now if you would like to validate the basic operation before proceeding with the actual Delphi build step.
In the Build section, click on the Add build step button and select the Execute Windows batch command option. In the Command text box enter in the following:
1
"%WORKSPACE%\Utils\Build_10.4.bat" "%WORKSPACE%\Projects\Hello World\Source" HelloWorld.dproj Debug Win32
This command should be obvious as we are passing in our four parameters to the Build_10.4.bat file - the path to the project file, the project filename, and selecting a Debug build configuration and Win32 platform build.
Click on the Save button and your first Delphi build job should be ready to go! You will be presented with the Job Status Page where you can click on the Build Now button to manually execute your first Jenkins build. Once you click that button, within a few seconds a build will be triggered and displayed as pending in the Build History section of the screen.
Checkpoint: If everything goes as planned, you should have a Build #1 listed with a blue circle icon next to it signifying success!
Customize Your Delphi Build Job
Building the project manually within Jenkins is a great step, but we really need to get this process automated. Click on the Configure button on the Job Status Page to bring up the detailed config screen.
The first item under Description is Discard old builds and this is something you may want to configure so click on that to display configurable details. You can decide how many Days to keep builds and Max # of builds to keep along with an Advanced option dealing with artifacts.
Next you will want to automate the build process so you do not have to click the build button in Jenkins. Two easy Build Triggers to consider are Build periodically and Poll SCM. If you check the “Build periodically” config item you can establish as Schedule for this job to be built. For example if you want your job will be built every day about 3:15am enter the following schedule (following the cron syntax which is five fields separated by whitespace: MINUTE HOUR DOM MONTH DOW)
1
15 3 * * *
You can also poll to detect changes in version control by checking “Poll SCM” option which also brings up a Schedule to define how often polling is performed. For example, you could poll for changes every hour from 8am-5pm on Monday-Friday by using the following schedule (where H defines as “sometime in that range”; since it was used in the minutes column, it will be a time between x:00 and x:59. H is derived from a hash of the job name and is not random is recommended for use to spread the load across your jobs but note an open issue on inconsistencies in implementation.) For those unfamiliar with cron syntax a nice site to reference is crontab.guru which allows you experiment with your cron statements, but unfortunately does not support the special H symbol used by Jenkins.
1
H 8-17 * * 1-5
Note: Jenkins has quite a bit support for working with GitHub. You should not have to always poll your projects, but it is an easy universal way to get quickly started with automated builds.
For our example, select the Poll SCM option and enter the following Schedule to check every two minutes to see if a new revision is available:
1
*/2 * * * *
Click on Save to save your changes to this Job.
Checkpoint: You should now see this project automatically built by Jenkins shortly after you make a change and push it to GitHub… a major step forward! Test it out by making a change to your delphi-automation-sandbox repository and pushing your change. Your Jenkins server is polling the repository and should automatically detect the change within 2 minutes or so and distribute the job to your Jenkins Agent. Your agent will create or update the repository in the LocalCache folder and kick off a Delphi build.
Setup Email Notifications
Now that you have builds being automatically performed by Jenkins, you will want to be informed when those builds fail. Jenkins makes this easy by allowing you to configure email notifications. (Note: there are plenty of other plugins available for other types of notifications like a Slack Notification plugin.)
To configure email, visit the Jenkins Dashboard, select Manage Jenkins, and then select Configure System. You will need to decide on which email address to utilize to send out notifications from Jenkins. Enter this email address into the System Admin e-mail address option currently listed under the Jenkins Location section. Also find and populate both Extended E-mail Notification and the E-mail Notification sections. (See StackOverflow question on why there’s two.) Ensure this works by clicking on the Test configuration by sending test e-mail option, entering a Test e-mail recipient address, and clicking on the Test configuration button.
After you have entered and tested your SMTP settings, bring up the Project Configuration Page of this first sample project and scroll down to the bottom and click on the Add post-build action button and select the E-mail Notification item. You will be able to define a list of one or more Recipients and then check the option to Send e-mail for every unstable build. Finally, click on the Save button.
Break and Fix the Build
It is time for some experimentation! Change some code to break the build, push your changes to GitHub and wait for the Jenkins job to send you a failure notification. If you do not get an email failure notification soon, you will need to check out the projects build status within Jenkins to discover your configuration error. After receiving your email, repair the code and do another commit push to ensure everything works as expected. This process should give you more confidence that your build job is properly configured.
Think about how you want to present future build failures to you and your team. You can play around with this demo project until you get your preferred notification system implemented. You can get creative and have some fun with these notifications!
Add Support for Unit Tests
The sample Hello World project also contains a simple unit test project. We will edit the Jenkins project next to build and run the unit tests every time the project is built.
Bring up the Project Configuration Page of this first sample project and scroll down to the bottom and select Add build step and then select the Execute Windows batch command option. We will use our simple Delphi batch file to build the unit test project. In the Command text box enter in the following:
1
"%WORKSPACE%\Utils\Build_10.4.bat" "%WORKSPACE%\Projects\Hello World\Tests\DUnit" HelloWorldTests.dproj Debug Win32
Click on Add build step again and then again select the Execute Windows batch command option. In the Command text box enter in the following to run the newly created unit test executable (which will create a dunit-report.xml report file upon completion):
1
"%WORKSPACE%\Projects\Hello World\Tests\DUnit\Win32\Debug\HelloWorldTests.exe"
For reference, this is an example of the dunit-report.xml file created:
1
2
3
4
5
6
7
8
9
10
11
12
13
14
15
16
17
18
19
<?xml version="1.0" encoding="UTF-8"?>
<test-results name="HelloWorldTests.exe" total="2" not-run="0" errors="0" failures="0" inconclusive="0" skipped="0" invalid="0" ignored="0" date="1/13/2021" time="0.000">
  <environment nunit-version="2.6.4" clr-version="" os-version="" platform="" cwd="" machine-name="" user="" user-domain=""/>
  <culture-info current-culture="" current-uiculture=""/>
  <test-suite type="Assembly" name="HelloWorldTests.exe" executed="True" time="0.000" result="Success" success="True">
    <results>
      <test-suite type="Namespace" name="HelloWorldTests" executed="True" time="0.000" result="Success" success="True">
        <results>
          <test-suite type="TestFixture" name="TestTMessageGenerator" executed="True" time="0.000" result="Success" success="True">
            <results>
              <test-case name="TestDefaultMessage" executed="True" success="True" result="Success" time="0.000"/>
              <test-case name="TestAlwaysTrue" executed="True" success="True" result="Success" time="0.000"/>
            </results>
          </test-suite>
        </results>
      </test-suite>
    </results>
  </test-suite>
</test-results>
Add a Post-build Action to parse the DUnit report file, selecting Process xUnit test result report and select the Report Type of “NUnit-2.x (default)” and then input this text for the Includes Pattern option:
1
Projects\Hello World\Tests\DUnit\Win32\Debug\dunit-report.xml
Force a new build for run the new unit test build steps which you just added. Afterwards, you will have a new graph on your Job Status Page displaying a Test Result Trend. If you install the Test Results Analyzer plugin, will also get a new menu option to bring up the Test Results Analyzer that displays the test status of most recent builds in a nice table format. (There are other plugins available. This bite size chunk is simply to get the report file generated and you can expand on its usage over time.)
To ensure everything is working properly, break the unit test with a simple change and push your changes to GitHub. Again, wait for Jenkins to send out a failure notification and then repair it.
Checkpoint: You should now be able to push your changes to GitHub and have the project rebuilt, unit tests executed, be notified of any failures, and start building a history of your testing process! (Isn’t that elephant tasty?)
Test Restoring Your Jenkins Server from Your Backup
Another confidence builder activity to perform (after you have decided on the backup method to be used) is to test a server rebuild as an untested backup is not especially useful. You should do this test before you add a bunch of custom jobs.
Be aware that each job directory contains its project configuration and all the build history. If you have an inactive project and would like to archive the Jenkins project config and history, you can simply make a backup of the project directory and then remove that directory. Note if you are manually adding or removing project directories outside of Jenkins, you can use the Reload Configuration from Disk option within the Manage Jenkins action in the dashboard.
Next Steps
Establish Code Quality Metrics to be Monitored
It is important to track the quality of your code over time. Jenkins will track the build failures and testing results over time but there are many other metrics available. One Delphi specific product was reviewed on this blog in November 2019 called Pascal Expert from a company called Peganza. This tool is an IDE plug-in which can generate reports of your code quality within the IDE using a set of 140+ warnings. This is a small subset of the warnings found in their main product called Pascal Analyzer which is the premiere static code analysis tool on the market for Delphi today. While your developer documentation can include guidelines to inform developers on what code can be checked in based on Pascal Expert reports, you can also include running Pascal Analyzer reports on your projects to issue automated build warning notices if errors are detected from a full static code analysis. If you have never run these tools on your code before, you will likely be surprised by the sheer quantity of warnings which are produced. Again, eat the elephant bite by bite. Whatever is produced from the first run of the tool should be considered your baseline. Every improvement from that point on is just that - an improvement. You need to define which warnings are important enough to flag the build as a failure and slowly attack the problem until you have a clean build and then keep it clean.
Even though Peganza’s tools are awesome, you do not have to purchase an additional tool to get some code metrics as RAD Studio has a set of source code audits and metrics built-in to every version. (The Enterprise Edition has an expanded set.) Developers can run these tools within the IDE before checking in their code. (Again, update your developer documentation as required. You can check out how these tools work on this YouTube video by Mike Rozlog.) You can introduce the AuditsCLI.exe to run a Jenkins build job to run these audits and metrics from the command line.
Note: remember Goodhart’s Law as it applies to managing metrics. When a measure becomes a target, it ceases to be a good measure.
Ensure Continuous Delivery
One of the main goals this automation process is to ensure that you can deliver your applications at any time. Through the automation discussed above, you can assure your team that any application which you manage can be easily built and verified with a suite of automated tests. This reduces the problems of failing to meet required delivery deadlines and allows you to take better advantage of opportunities to gain new business by having a more reliable build and test process.
Continuous Delivery (CD) ensures any successful build can be deployed into production with a single-click manual process. This process is triggered by management requesting a new version. The dev team leans on all the Jenkins automation to ensure a quick response to one of these deployment requests from management. Artifacts from successful builds can be stored for release and then automatically deployed via Jenkins jobs. These jobs should include a roll-back method in case a production deployment fails in some way.
Consider Continuous Deployment
Some applications could greatly benefit from Continuous Deployment. This process relies on Continuous Delivery to ensure the project can be deployed by a single-click and takes it one step further by completely automating the deployment process in response to a monitored event such as a code check-in. For each of your managed projects, you should define whether they can be automatically updated at any time and strive to automate the deployment process when possible.
Newly implemented Continuous Deployment end user facing projects should consider relying on a Blue/Green deployment model with a gradual migration of users from one version to the next. This process allows some users to be using the latest version while more users and migrated over time until all users are on the latest version and the process repeats with the next release.
Some Terminology Notes
Many Jenkins references simply are not up to date with the latest terminology. For example, the slave.jar file was renamed to agent.jar and they are still cleaning up references.
You will also see Hudson mentioned in many places that involve Jenkins. There is a lot of information out on the web on this topic so I will not get into too much detail here, but one is a fork of the other which was done at a time when some people disagreed on the direction of the project. Hudson stayed around for a while in direct competition to Jenkins with a different changed codebase and different team, but Hudson is now dead. Jenkins won the war, but the Hudson references still linger.
I hope this general introduction to introducing Jenkins into your project development lifecycle has sparked some interest in automation. Through the powerful combination of automation and testing, you can be more creative and take more risks while feeling less stressed. For the Delphi programmers out there - the more automation takes over the manual grunt work of building, testing, and deploying projects - it will give you more time to code! For the managers out there - the less time your dev staff is involved in this build/test/deploy process the more time they will have to create that new feature your clients have been waiting for! And the quicker the bugs are found, the quicker they are solved and the less time will be spent in maintaining old code versus creating new code.
Remark: Eating an elephant one bite at a time is a common phrase used in the United States and may not be well received by some … please substitute “eating elephants” for something else extremely large to eat as desired.