GitHub introduced Vigilant mode in April of this year and the feature is still in Beta. The world is trying to become more secure and everyone is trying to catch up. You probably have seen the Verified tag next to commits listed in GitHub for signed commits which they first introduced back in 2016. For those that currently do not sign their commits before they push changes to GitHub, the commits are obviously not listed as Verified. All changes made on GitHub in the browser (like editing the Readme.md file) do show as Verified because GitHub automatically signs those commits for you.
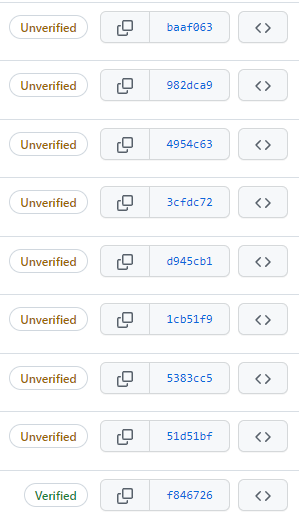
GitHub now allows you to take this option to the next level by enabling Vigilant mode on your account. Once you enable this new feature in the SSH and GPG keys settings page, your commits can be shown with two additional statuses: Partially verified and Unverified. If you haven’t been signing your commits, then all of your commits made outside of the browser will now be tagged as Unverified as shown below. That looks bad, doesn’t it? Well, it should because these commits were not cryptographically verified.
Signing your git commits on Windows is actually fairly easy to do if you are a Linux command prompt guru that knows all the tooling. But if you are an old-school Windows developer it might be a little more challenging to get started. I have created a simple batch file to help you easily get configured for signing all your commits with your own private key.
GPG is the de facto standard open source implementation of PGP. You have probably heard of Pretty Good Privacy when it comes to secure email. There is a long history of its use and the tooling is quite complex. The main use is to provide security for data communications. We will use it to sign our git commits. If interested, there is a lot of interesting material available on the web about PGP and GPG.
The good news is that GPG is probably already on your system and you don’t need to get too involved in its inner working just to get your commits signed. Git for Windows installs GPG by default in the %PROGRAMFILES%\git\usr\bin folder. You should verify the location of gpg.exe on your system before going much further. (Note: another option to get GPG installed on Windows is gpgwin.)
I assume you know where your git.exe is located on your system as you will need that to continue. For those that use TortoiseGit, it relies on a git.exe as a system prerequisite. Typically, Git For Windows is used to satisfy the command line git requirement, and by default it installs git.exe in %PROGRAMFILES%\git\bin\git.exe.
Process Overview
What we need to do is to create a keypair used for asymmetric cryptography. Most people are familiar with symmetric cryptography as it is an easy concept to grasp: you use a super secret passphrase to either encrypt or decrypt some data. If you don’t have the passphrase, then you should not be able to do either action. Asymmetric cryptography involves two keys, one key that you keep secured with a super-secret passphrase (private key) and one key that you can share with the world (public key.) Anyone that has the public key can verify that your signed contents haven’t changed - and they do not need to know the super-secret passphrase to perform that validation. (For asymmetric encryption the process is flipped - anyone can use a public key to encrypt something and only the person with the super-secret passphrase can decrypt it.)
We will use GPG to create our keypair and then configure git.exe to use our private key to digitally sign our commits. We will then share our public key with GitHub so they can digitally authenticate our commits and show the nice looking Verified status next to each of our new commits.
GIT Configuration Review
Git has a three-tiered configuration system where each level inherits and optionally overrides its parent settings. (System, Global, Local) For example, if you set your Name and Email Address in the Global configuration file (found in %USERPROFILE%\.gitconfig) then all repositories that you use while logged on to your Windows account will use that specific name and email address on commits. This remains true unless a specific repository overrides the name and email address in the repository’s configuration (which is found within a file named config in the hidden .git folder at the root folder of the repository.) Typically, you set your most used configuration in your Global configuration and then override that configuration for specific repositories. For example, your first and last name will likely stay the same for most of your repositories so you can configure that in your global git config.
For signing commits, you will need to decide where to use your key pair. If you only use one personality and you want to sign every commit for every repository on your system using the same Name and Email Address, then save your key in your Global config. If you only have one or more specific repositories that you want to sign your commits, then save your key in a repository-level Local config.
Your keypair is associated with your User ID which is your Name and Email Address. If you want to sign commits using multiple email accounts, you will need to create multiple keypairs with this script. (There are ways to have master keys with subkeys defined for different purposes, but that goes into waters deeper than we want to swim in here.)
Note that you do not need to create a unique keypair for every repository that uses the same User ID. You can also easily assign the same signing key id for one or more repositories. You create the keypair in your first repository using the provided batch file script. Then, if you want to reuse that same signing key in another repository simply run the same batch file script in another repository folder and skip the key creation step. (Type in N when prompted to “Create a new keypair for your email address? (Y/N)” and then type in L for Local when prompted to Configure your git config.) Alternatively, a little copy and paste inside your .git/config files is pretty easy to do.
Introducing SetupSignedCommits.bat
I have added a Gist on GitHub for a SetupSignedCommits.bat file used to easily create a new GPG keypair and configuring Git to sign commits. By default, the batch file expects one parameter for use as your super-secret passphrase when creating your keypair. If desired, you can simply remove the parameter check and type your passphrase into the batch file (this might sound like a good idea for ease of use, but it is never recommended to keep a super-secret passphrase saved in clear text on disk.)
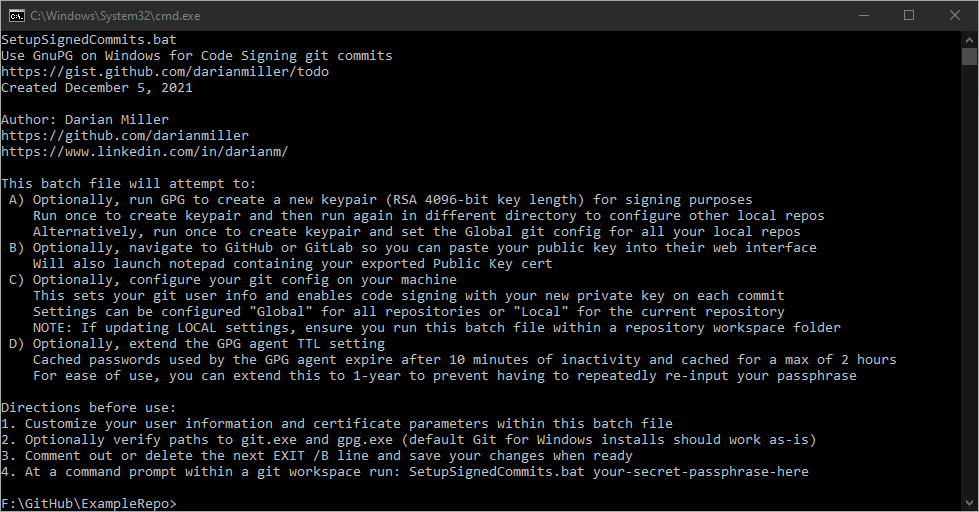
If you run this batch file without making changes, you will see a help screen like the one below informing you of what the batch file will do and how to use it.
Directions include performing four simple steps:
1. Customize your user information and certificate parameters within the batch file
Edit the file in Notepad or your favorite text editor and find the section commented with CUSTOMIZE YOUR INFO and replace the sample John Doe information with your own FirstName, LastName, and EmailAddress. You can also configure a custom Comment and expiration time period if desired.
2. Optionally verify paths to git.exe and gpg.exe
Find the section commented with VERIFY PATHS and ensure the paths to gpg.exe and git.exe are correct. The paths provided should work as-is if you installed Git for Windows. The default path for gpg.exe is “%PROGRAMFILES%\Git\usr\bin\gpg.exe” and the default path for git.exe is “%PROGRAMFILES%\Git\bin\git.exe” You could validate the settings by launching a command prompt and type these in with a --version parameter to see if they work as expected like this:
1
2
"%PROGRAMFILES%\\Git\\bin\\git.exe" --version
"%PROGRAMFILES%\\Git\\usr\\bin\\gpg.exe" --version
3. Comment out or delete the next line with “EXIT /B” and save your changes when ready
There is a simple error-prevention mechanism included in the batch file to prevent you from creating a keypair for the John Smith sample User ID. Simply remove or comment out the EXIT /B line after the help screen text.
4. At a command prompt run: SetupSignedCommits.bat yourpassphrase
Save your customizations to the batch file and then copy the file to your target folder. At a command prompt in this folder simply run this batch file with one parameter that designates your private key password like:
1
SetupSignedCommits MyPassword123
(Of course, no one actually uses silly passwords like MyPassword123, right?)
Four Optional Actions Performed
When you execute the batch file script, you will be prompted to perform four distinct actions as specified in the help screen and listed below (actions marked as A through D):
A) Optionally, run GPG to create a new keypair for signing purposes
Create a new keypair for
? (Y/N)
The first time you execute the script you should answer Y (yes) to this question as this will launch gpg.exe and create a private and public key for your provided User ID. This is currently set to use RSA with 4096 bit keys which is the current recommended value.
Note that GPG keeps data files in your user home directory within a .gnupg folder. Once you are relying on your private key for signing your commits, you should ensure this is backed up and kept secure. Your private key is protected on disk with your super-secure passphrase but it is still something you should protect.
B) Optionally, navigate to GitHub or GitLab so you can paste your public key into their web interface
Adding new Public Key to GitHub, GitLab, or Other? [Enter H, L, or O]:
Once you have a private and public keypair created, you can add your public key to GitHub or GitLab. You will be prompted to enter H for GitHub, L for GitLab or O for other. Once your keypair is on disk, you can run this action later at any time to export your public key.
If you type in H then the page to add new GPG keys on GitHub will be launched in your default web browser. (https://github.com/settings/gpg/new)
If you type in L then the page to add new GPG keys on GitLab will be launched in your default web browser. (https://gitlab.com/-/profile/gpg_keys)
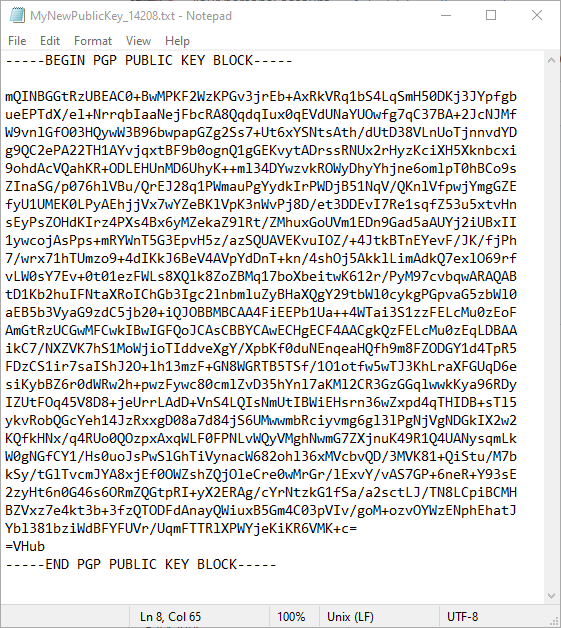
In either case, Notepad will also be launched containing your public key which has been exported in ascii text format. You should select the entire text to paste into GitHub or GitLab’s web page (including the —-BEGIN PGP PUBLIC KEY BLOCK—-) The public key is exported to a randomly named text file in your Temp directory and then deleted once you continue on with the script.
If you type in O then you will simply skip to the next action without your public key exported.
C) Optionally, configure your git config on your machine
Configure Global, Local, or Skip updating your Git config? [Enter G, L, or S]:
Once you have a keypair on file, you can configure git.exe to utilize it to sign commits. Specifically, the script will update your config file by adding information similar to that displayed below:
1
2
3
4
5
6
7
8
[user]
	name = John Smith
	email = johnsmith@yourhost.com
	signingkey = 3DBD546BEFB85936A2DD2D73CC510B70CBB4CC4A
[gpg]
	program = C:\\Program Files\\Git\\usr\\bin\\gpg.exe
[commit]
	gpgsign = true
If you entered L for a local config then inside the hidden .git folder, the config file will be updated with this information. (Note: if you select L for local and you are executing the batch file in a non-git workspace then you will simply get error messages from git telling you that –“local can only be used inside a git repository” and this action will fail to complete.)
If you entered G for a global config, then your .gitconfig file in your user home directory will be updated with the same information. You can always edit these files manually, or use your Windows git client to edit some (or all) of this information.
D) Optionally, extend the GPG agent TTL setting
Extend default gpg-agent timeout? (Y/N)
if you do not have custom gpg-agent settings on file already, you will be prompted to customize the agent configuration. If you answer Y to this question then default-cache-ttl and the maximum-cache-ttl configuration options will be extended. Simply answer N to skip.
Please note that gpg does not cache your password between system restarts or user logout. By setting a long TTL you are simply asserting that you want to enter your private key passphrase only once per logon. (With default settings, you will have to reinput your password after 10 minutes of inactivity, or at least every two hours since last asked.)
That is all there is to it. You can run the batch file in other repositories to configure their Local git configuration with your signing key. You can also easily create new keypairs as needed.
Summary
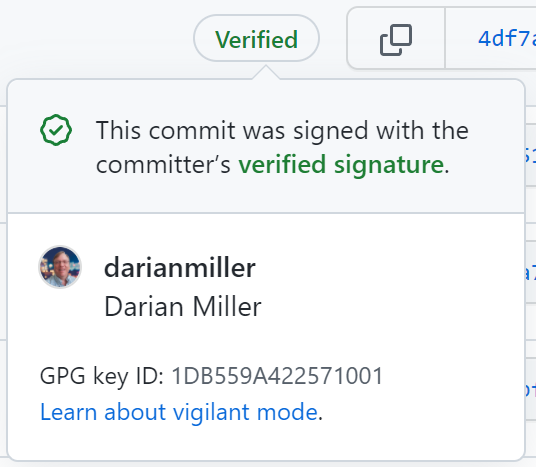
In just a few minutes, your new keypair should be created and you will see the Verified status flag next to your future commits on GitHub! Reading this blog post will take longer than actually performing the setup process. Of course, not everyone likes PGP but it works for this particular purpose fairly well.
Note: if your hard drive crashes and you lose access to your private key, leave your public key assigned in GitHub. If you delete your public key, then all previously Verified commits will immediately be marked as unverified. Simply create a new keypair and create a new public key in GitHub.
Please let me know if you have any comments, corrections or additions to my Gist!


